
A Few Shoulder Basics
A few students have shoulder issues and it has been on my radar to remind them of things they can do at home. I got the final push to do this home practice blog this week when an old friend reached out looking for a few ways to work with stiffness in her shoulder. So, Sadie, this is for you! Corey Chatis there are some gems in here for you my sweet friend (and happy early birthday!). Andy, Vance, KB, and Bebe good stuff in here for you all too!
The body is uniquely interconnected and it is very rare that pain or stiffness in an area such as the shoulder is limited or isolated to just that area. The shoulders relate to the hips, the neck, spine and so on. One of the beauties of a yoga practice is that if you ‘listen’ carefully to the body as it moves through your practice you start to feel and hear the relationships between parts and how there are interconnected and relate to the whole. One of the gifts of Guruji’s teaching is that he gave us props to help clarify our awareness. Props allow us to observe ourselves in space, to measure each side with our awareness, to create form and structure, and to bear witness to our asymmetries and then work with them skillfully. Guruji writes in Light on Life, ‘A great boon of yoga, even for relative beginners, is the happiness it brings, a state of self-reliant contentment.’ Guruji taught us with his method ways to take care of ourselves. And, wow, what a gift he left us. Eternally grateful for his brilliance and innovative approach to practice.
This sequence is a small attempt at giving you a handful of movements to try using very simple props that you hopefully have at home. A wall, a belt, a brick, a stool or kitchen counter will get you through a lot. While we have a fancy rope wall at our center from which I could show a multitude of variations, that wouldn’t help you much at home. So I have stuck to using only those props I think you might have kicking around. The most extensive printed work utilizing asana as therapy for the shoulder can be found in Lois Steinberg’s Neck and Shoulder therapeutic manual. This sequence doesn’t even come close to offering what her work covers but hopefully the few things I show here will help give some ways to work at home. This work can be used to start your practice but please do not consider it a full sequence by any stretch.
These first two variations can be useful in helping to establish the right direction and movement to the chest/shoulder when the arms are extended out to the side or down alongside you. An 8ft belt is ideal if you are taller (I can get away with a 6ft belt). While most of my instructions address the arms/shoulders you should apply all TADASANA actions to the body at all times, even if I don’t mention them in my instructions each time.
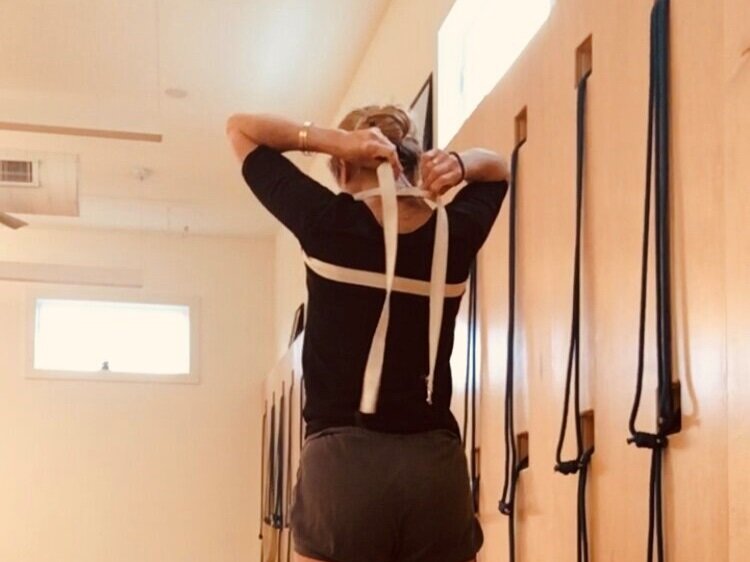
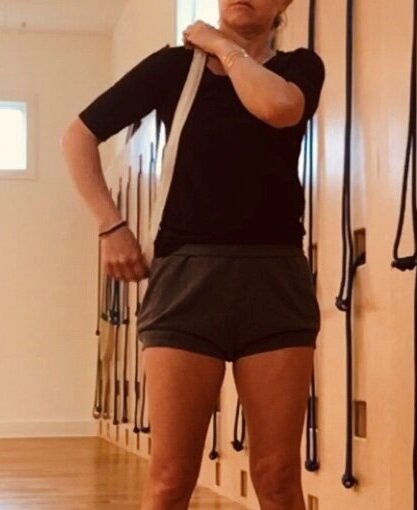
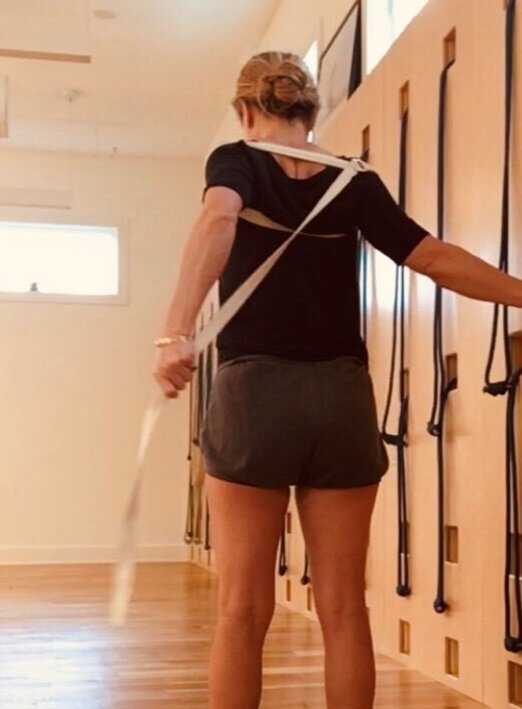
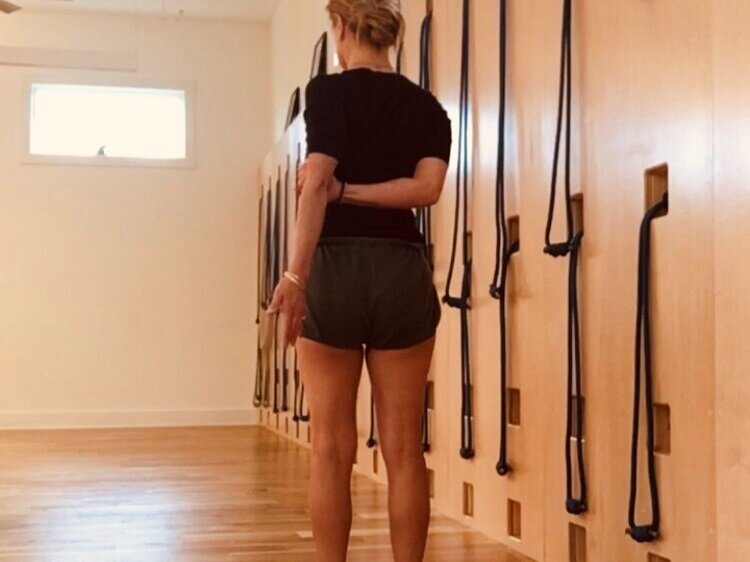
Simple Belt Harnass
I start with the middle of the belt against my upper back about at the tips of the shoulderblades, from there I take the loose ends up and over the shoulders and cross them behind me at the nape of the neck. From there I can reach and catch the crossed ends, as I pull down on the belt ends, it releases the trapezius down and allows the chest to reciprocally lift up. The shoulders are also gently rolled back which allows the chest to spread horizontally out to the side. This helps the body/mind to get a sense of direction, placement and how the shoulder/arm girdle should ‘feel’ in many of the poses to come.


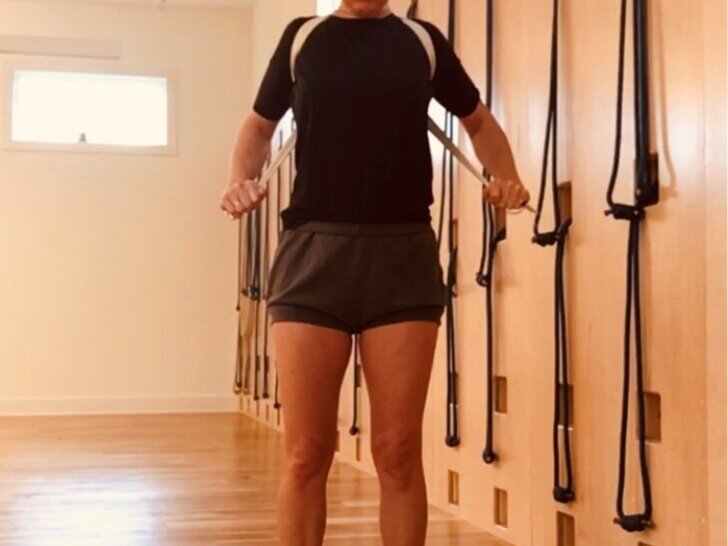
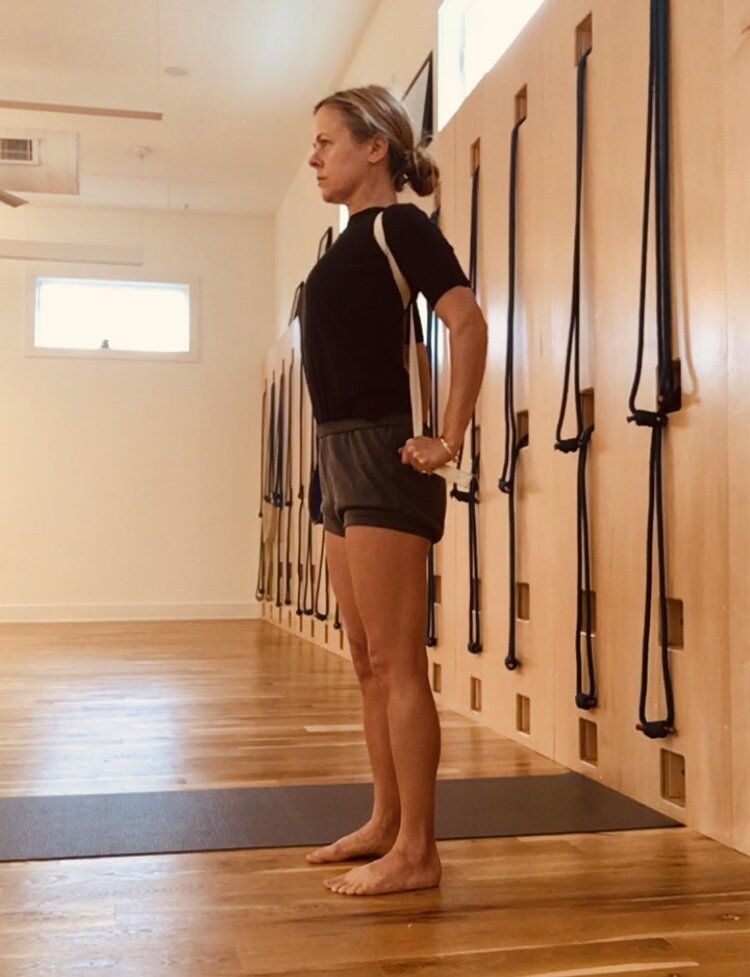
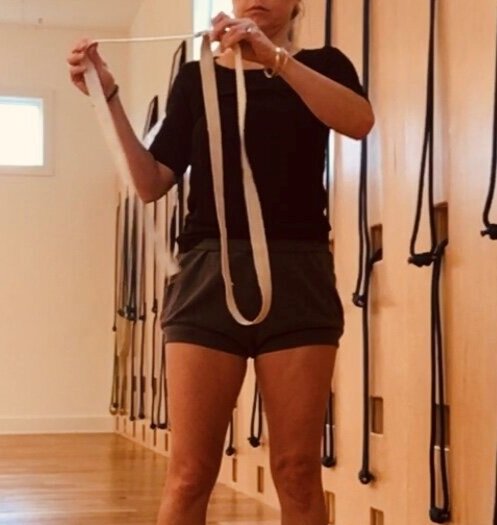
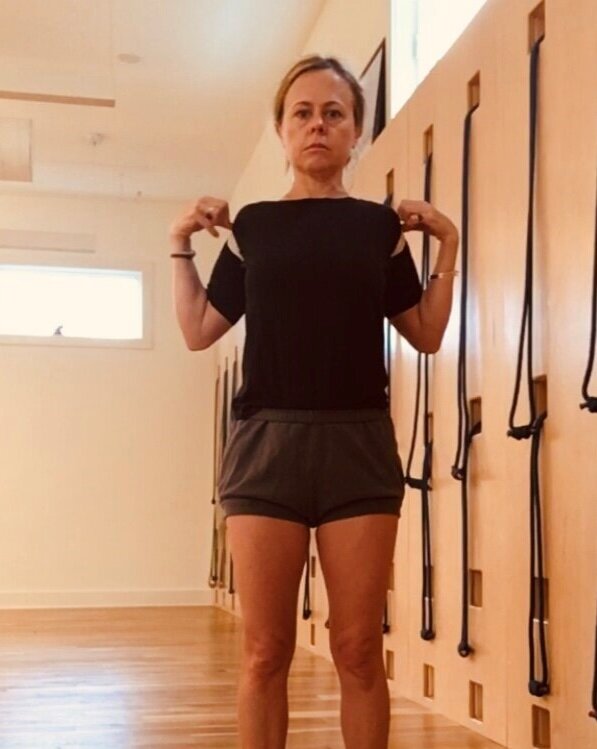
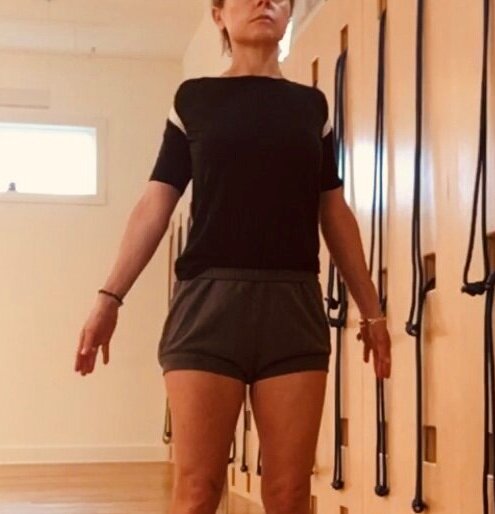
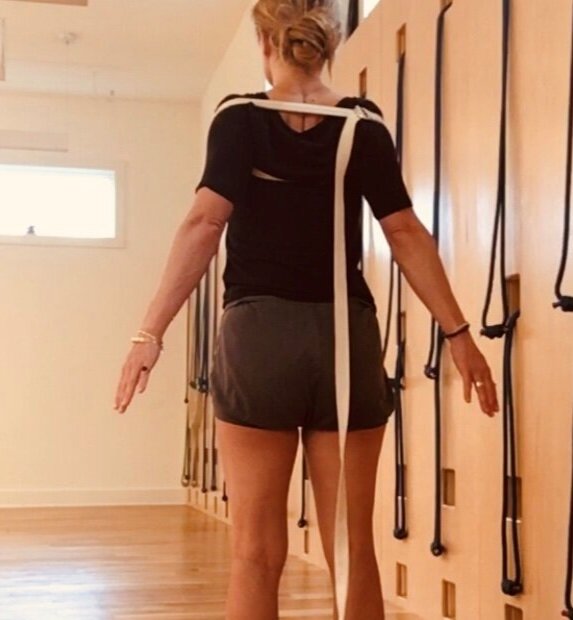
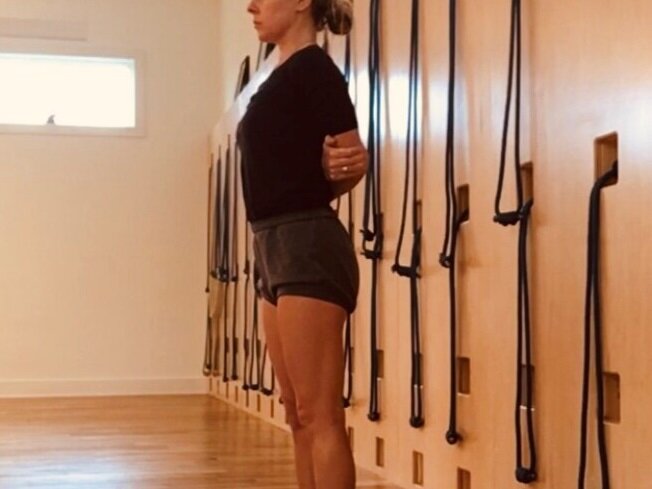
Simple Shoulder Jacket
My right shoulder is my stiff side. So when I position the belt in this next variation I place the buckle with the strap pulling in the direction of the wall behind me on my right shoulder as it will get the most traction. Start with a large loop, placing the belt buckle on the tight shoulder side and then slipping the loop on like a jacket:
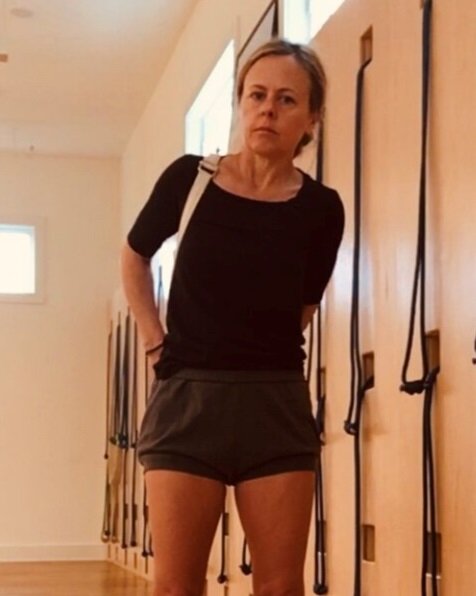
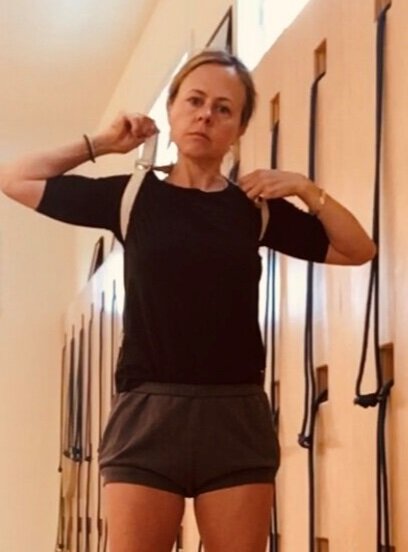
Once I have my ‘jacket’ on, I can adjust its tightness and tighten until it feels snug around the shoulder girdle. From here, I peel the edges of the belt down onto the very top crest of the upper arm to help roll the upper arm back. From there I can tighten again a bit from behind, it is useful to stay here for 5-8min. You can choose a sitting posture or sit on a stool while letting the shoulder absorb this shape:
Now we will be using the wall and a belt to help give you a sense of direction/form when the arms are overhead.
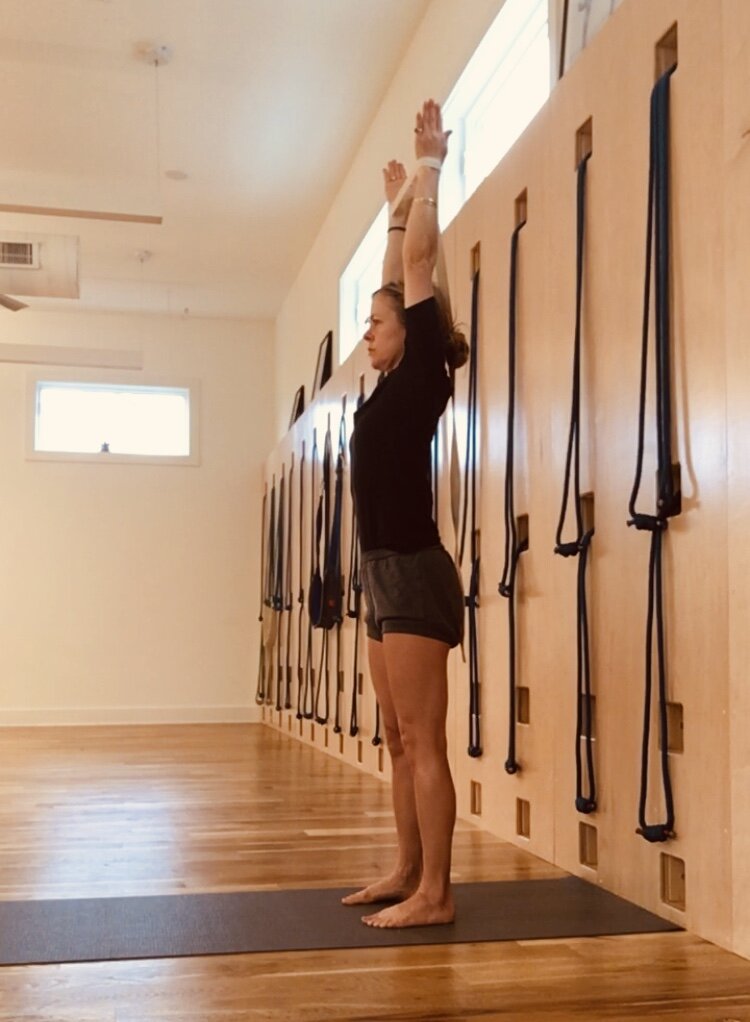
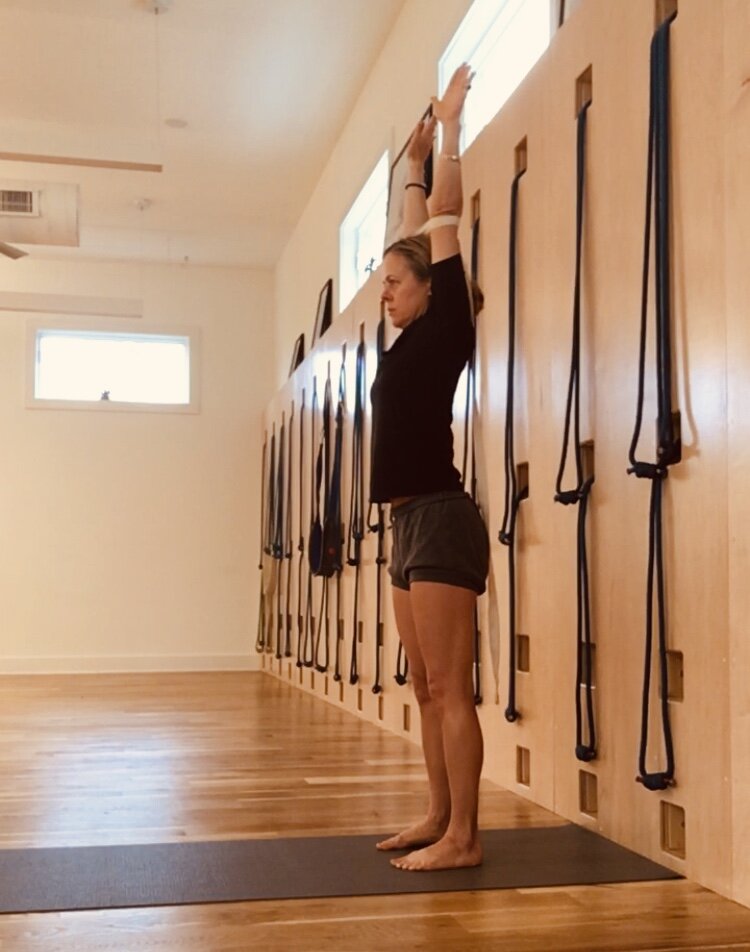
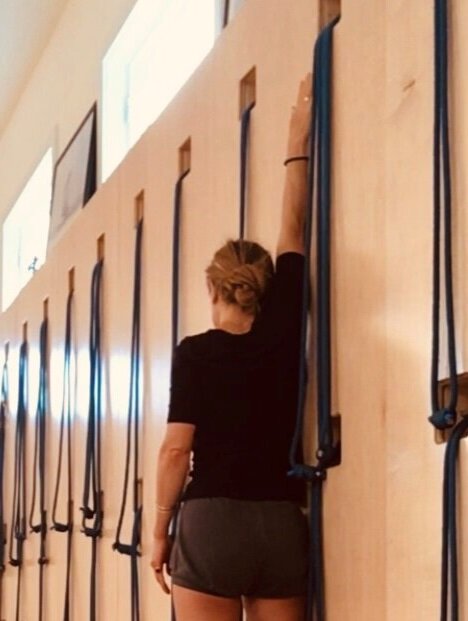
Urdvha Hastasana (upward hands stretch) facing the wall and with a belt
I have my toes close to the wall, palms facing the wall and as I climb the arms up the wall at the same time I release the buttocks/outer hips down, thighs roll in etc. Tadasana instructions must be integrated here! I roll the outer armpits and the outer upper arms towards the wall and stretch them up. This creates length in the spinal muscles, space in the neck, and begins to open the armpits up.

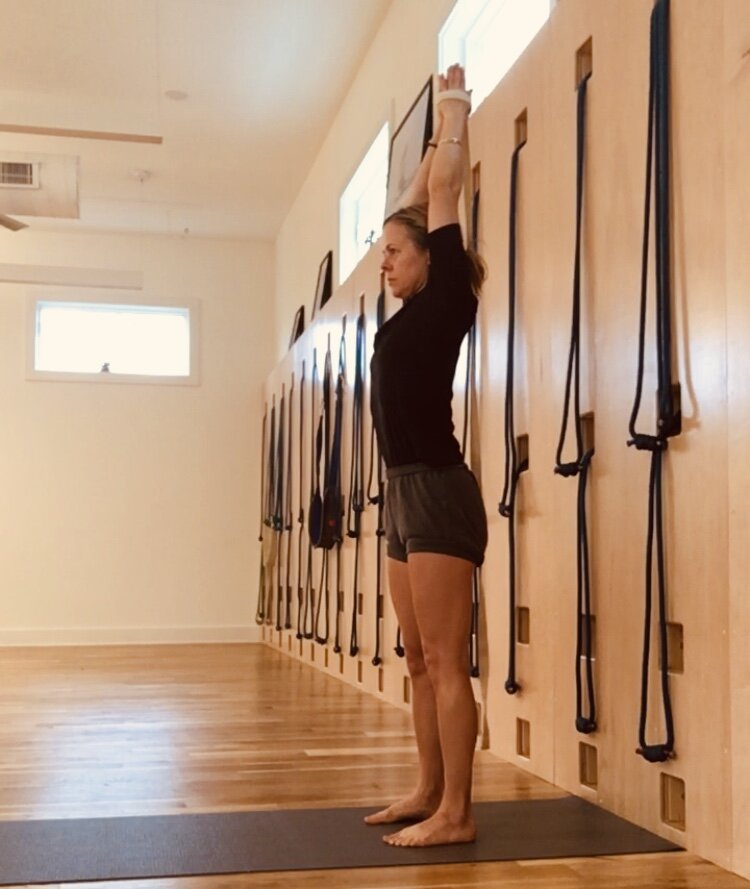
You can also try Urdvha Hastasana with a belt around the wrists and then with a belt around the elbow joint. Use the same arm rotation actions that you used at the wall. The belt will help tether the stiffer side to the more open side giving you a sense of the discrepancy between the two and also giving you a way to help the stiffer side to rise to meet the challenge of the more open side. You can try the palms facing each other and also have the palms face forward as though facing an imaginary wall. Try to stretch from the armpit upwards and like the last variation, elongate the buttocks at the same time down and away from the back waist. Like Tadasana, the thighs should roll in and move back.

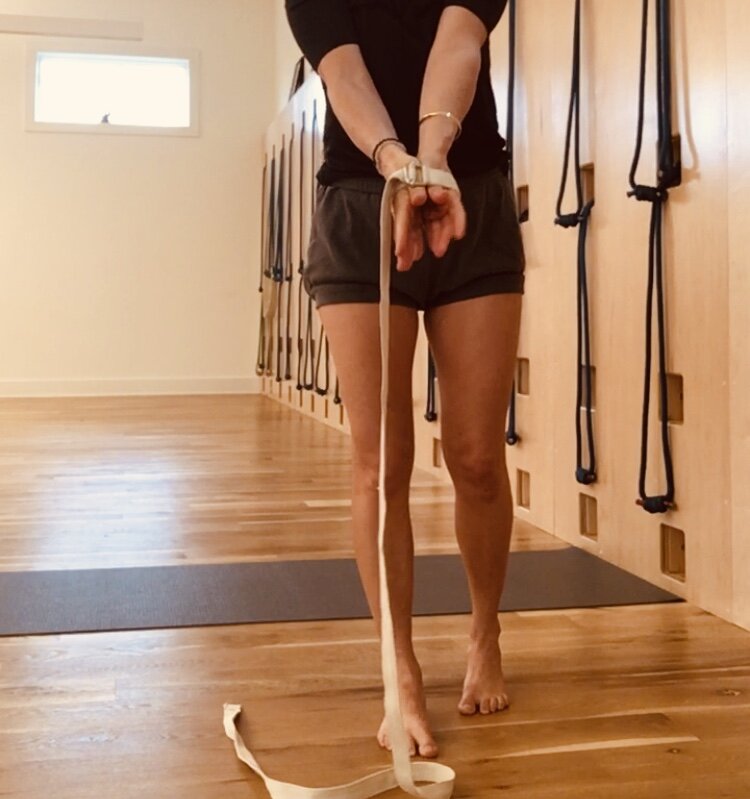
Urdvha Namaskar (upward hands in Namaskar greeting) using a belt
This pose brings the arms closer in, intensifying the stretch to the outer armpits. All earlier actions apply. See how I use the belt to hold my palms together:
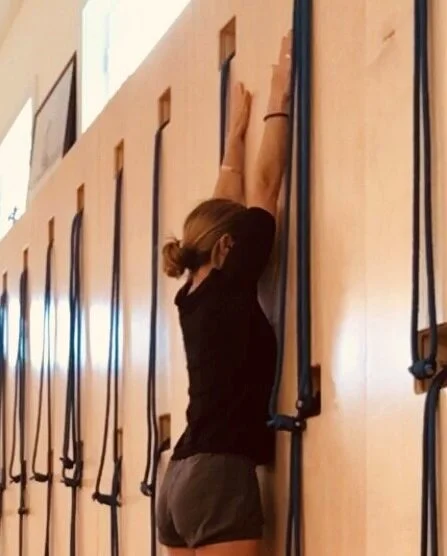
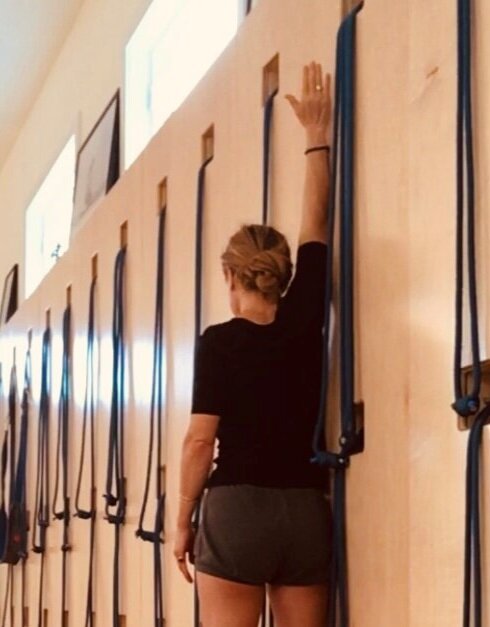
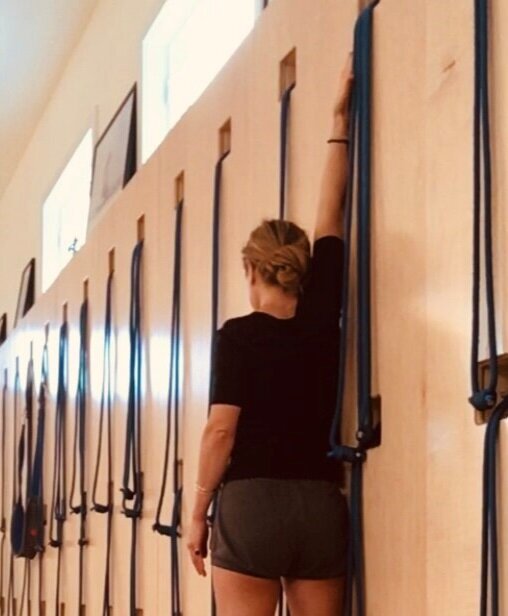
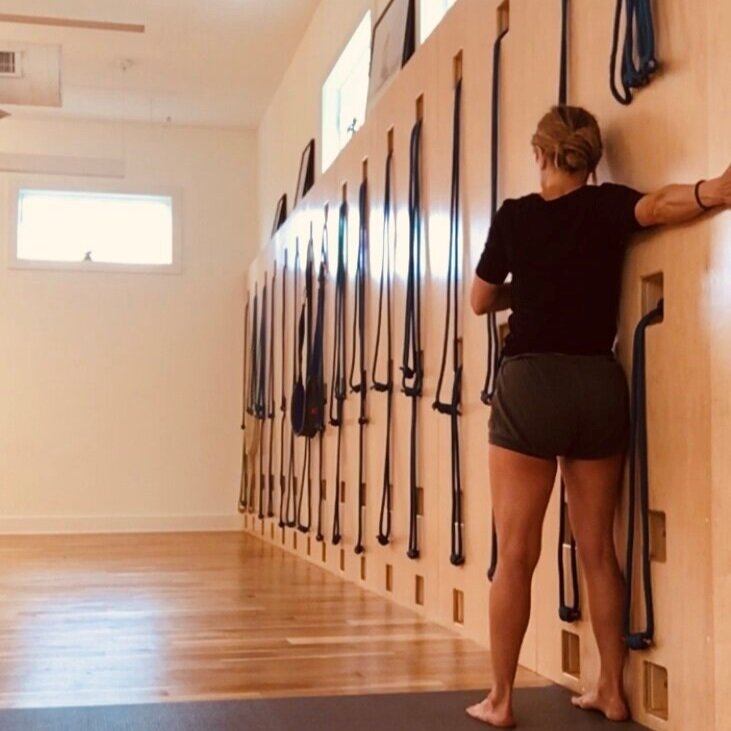
Anantasana at the wall. Repeat Urdvha Hastasana now with the palms to the wall, as you did above. Watch how from there I keep one palm at the wall and turn laterally to the side. I bring the whole side of the body to the wall, from the outer foot, to the outer hip to the outer armpit. This allows me to stretch each side independently.
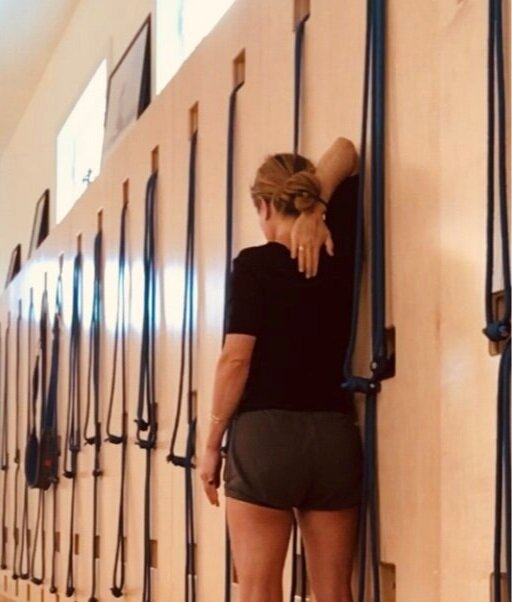
From here you can turn the palm to face forward and then the middle of the room and then bend to touch the upper back as in upper arm Gomukhasana:
In the next few variations the arms are extended out alongside the torso. The main action is that the inner arm, the bicep side of the arm, has to lift towards the ceiling, to help bring the shoulder blade down the back and in.
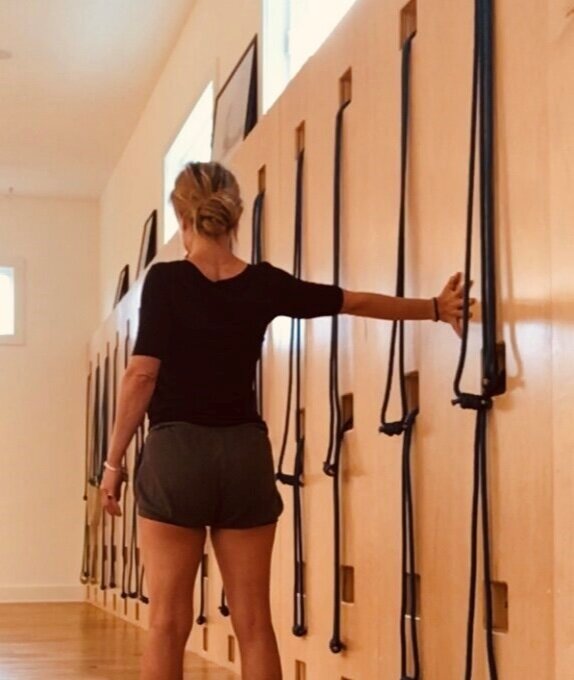
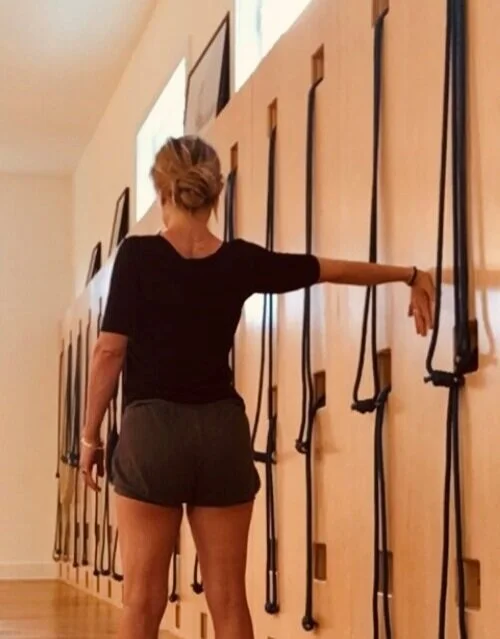
Ardha Parsva Hastasana (half hand/arm to one side)
I place my palm at the wall shoulder height, see how the arm is lateral, and in line with my shoulder. I press my palm into the wall, especially around the thumb joint I have to spread and press. I roll my inner arm towards the ceiling and grip the triceps in, tightening the elbow. As my palm reaches into the wall, I draw my shoulder blade down the back and onto the body, away from the wall.

From this position, I can rotate the fingers to point back and then further to point down towards the floor to intensify the rotation in the shoulder girdle, as the arm rotates the shoulder blade will secure more firmly onto the upper back and the stretch of the inner arm intensifies. These two variations are intensifiers and may not be possible at the start. You can stick to the first variation if that is intense/strong enough. Be sure you don’t push the head of the upper arm forward, keep it rolling back and down. It is important to keep the elbow joint tight:
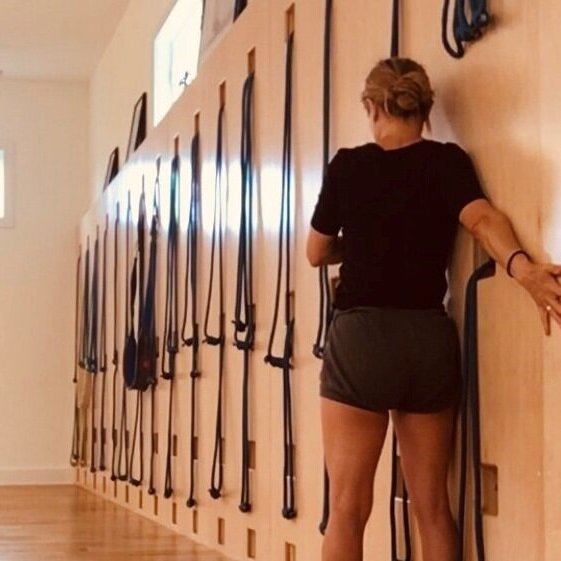
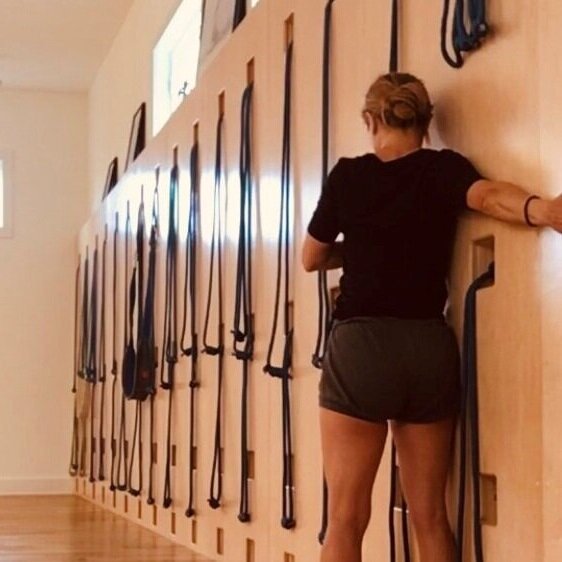
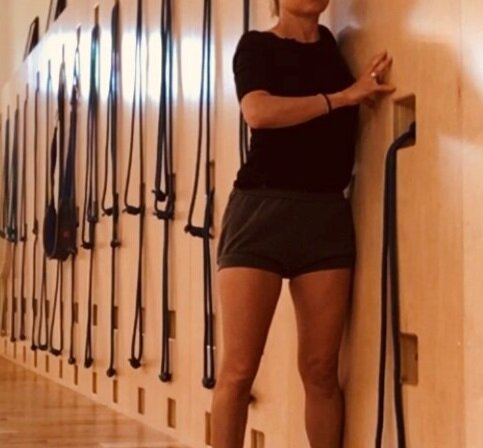
Viparita Ardha Hastasana (viparita means inverted, here you could say extended back arm pose)
I take my entire arm to the wall. My hand cut out a bit, but I am spreading it and pressing it into the wall. I start out with the whole line of the inner arm from palm to shoulder flush to wall and low. From here I walk the finger tips up the arm, keeping my arm pressed to the wall. Only walk the hand as high as it will comfortably go. Don’t force. Ever. Notice in the last pic how I am using my hands cupped at the wall to turn my torso away from the wall while keeping my arm and shoulder pinned to the wall.
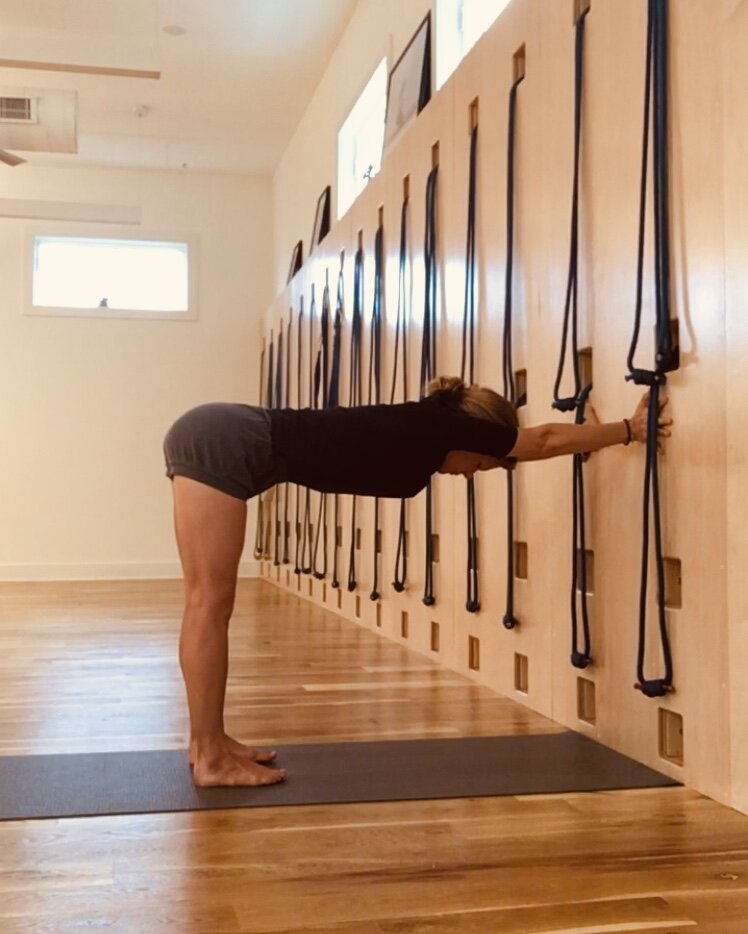
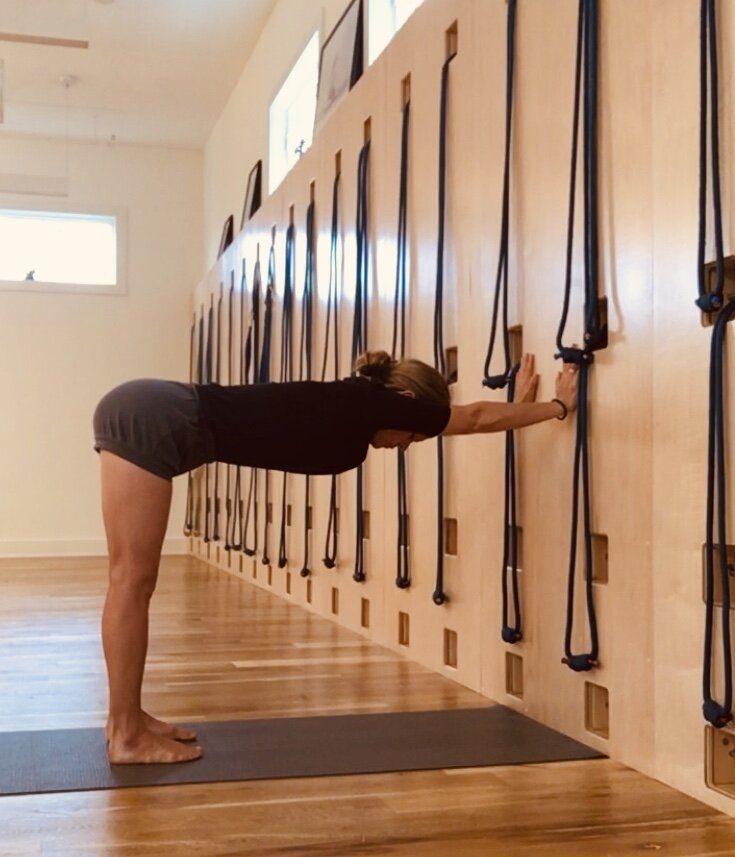
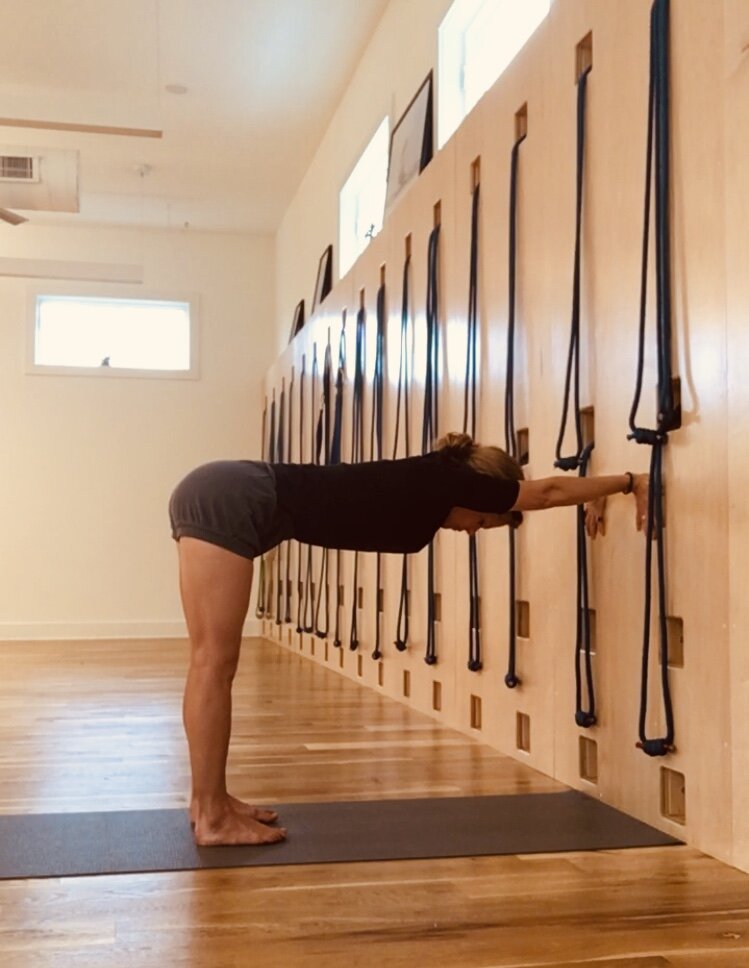
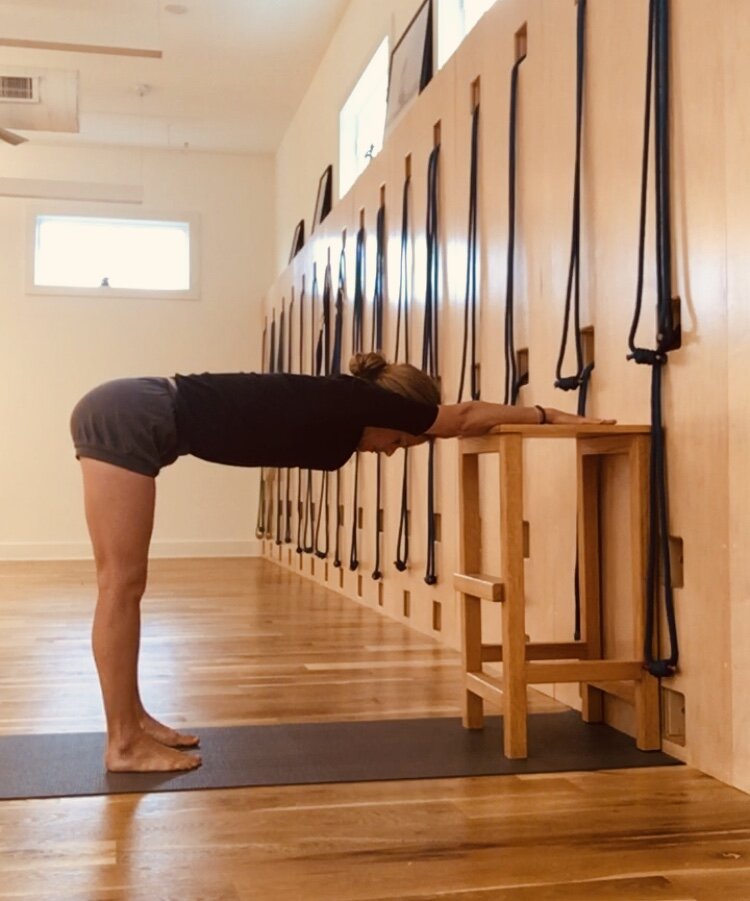
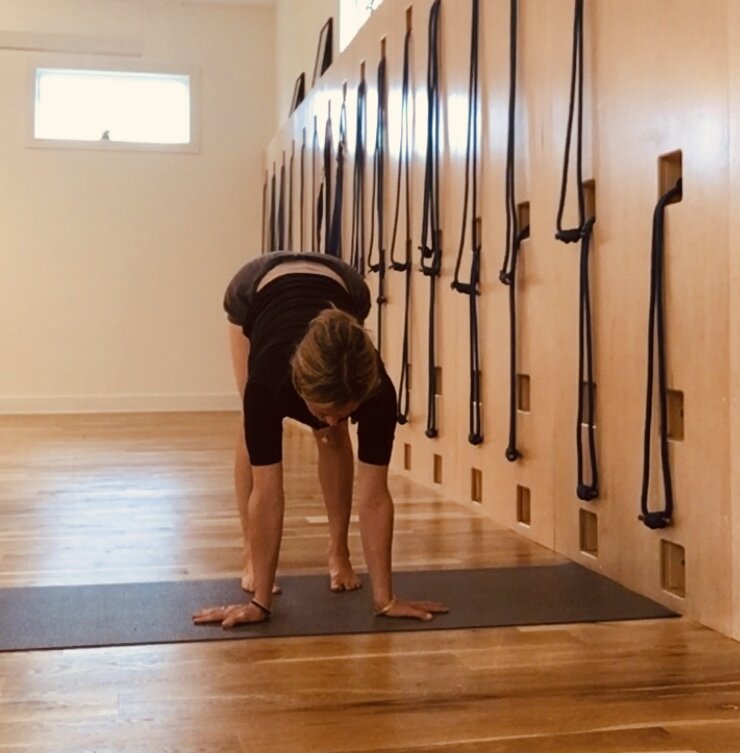
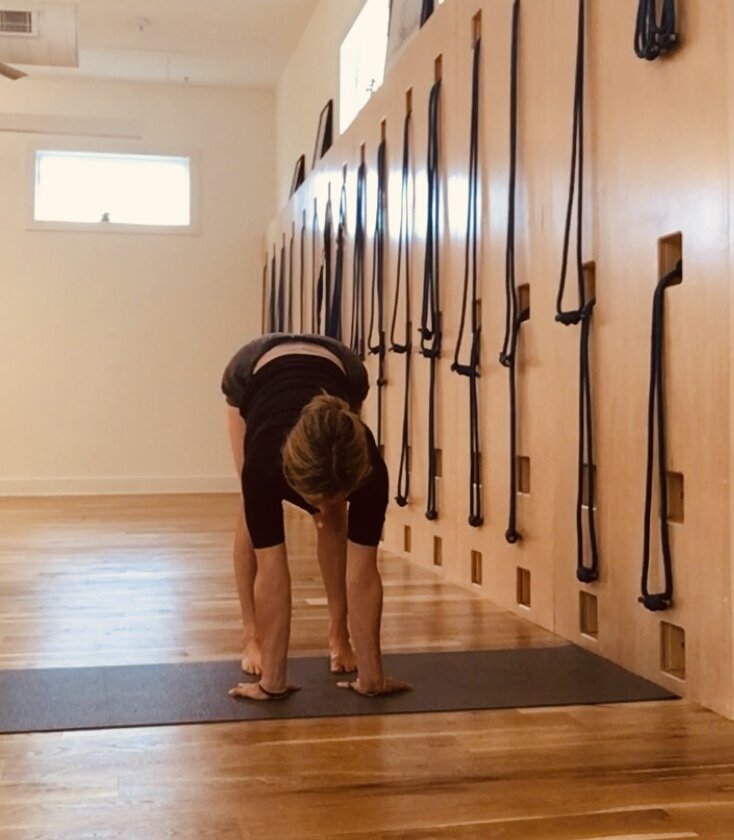
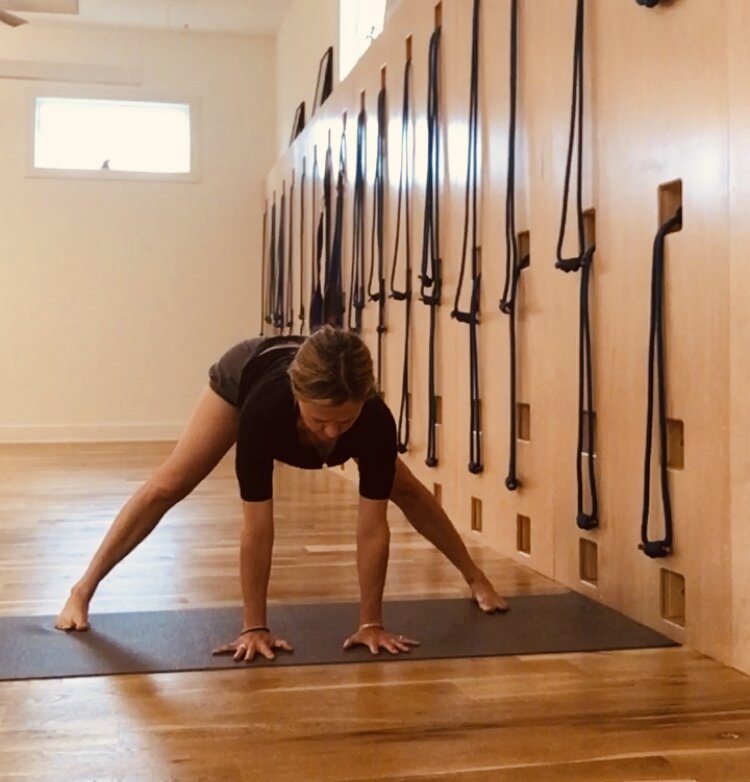
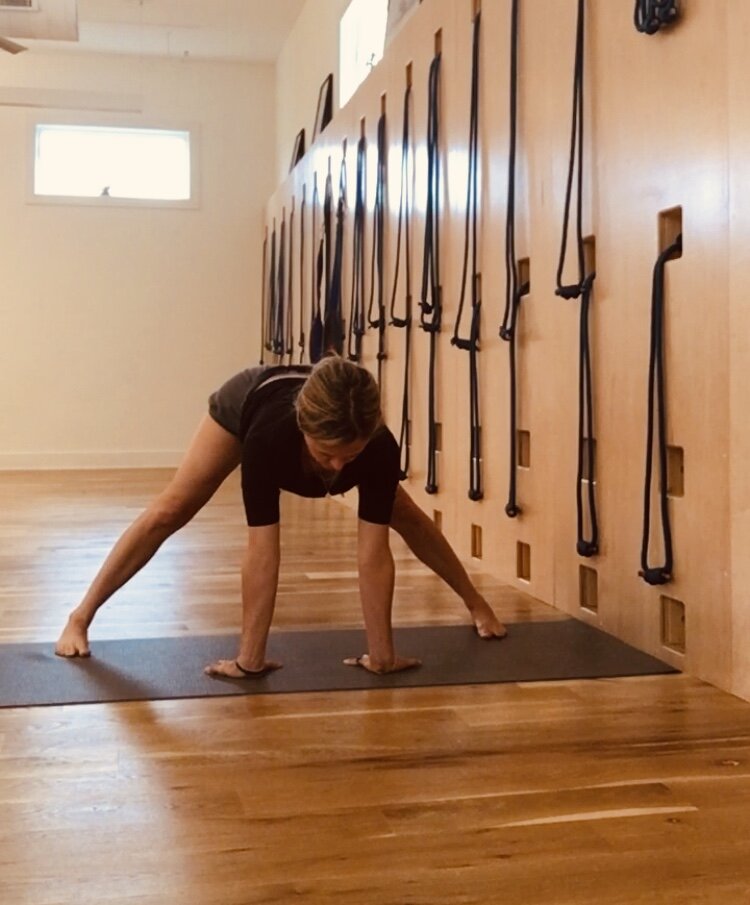
Ardha Uttanasana (half intense forward extension) palms to the wall
Here you are going to go through the same palm rotations as you did with the arm outstretched to the side. Notice my torso is parallel to the floor and my limbs are straight, joints tight. The outer armpits wrap down towards the floor, the inner upper arm lifts towards the ceiling.
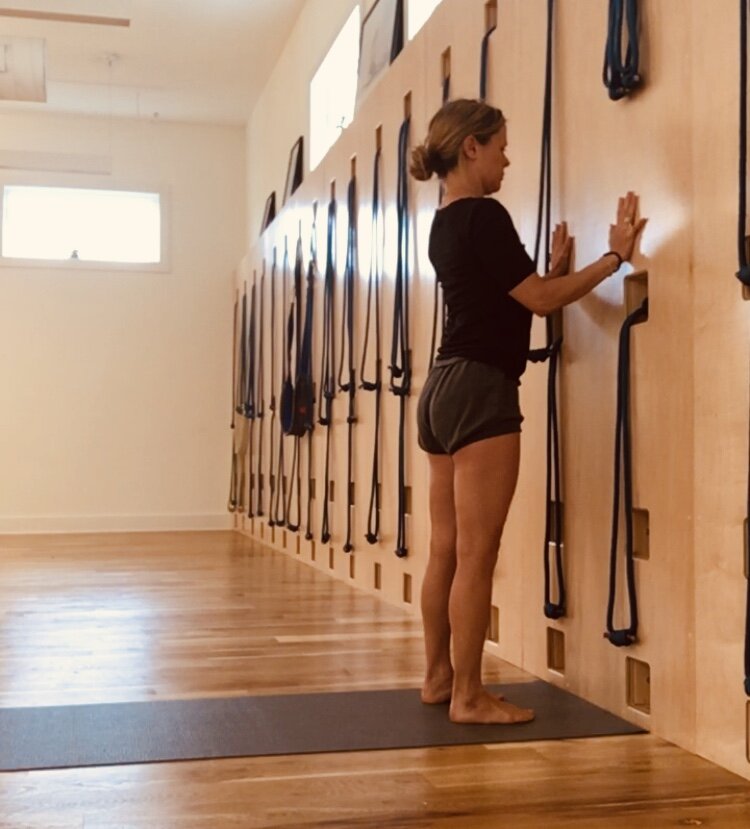
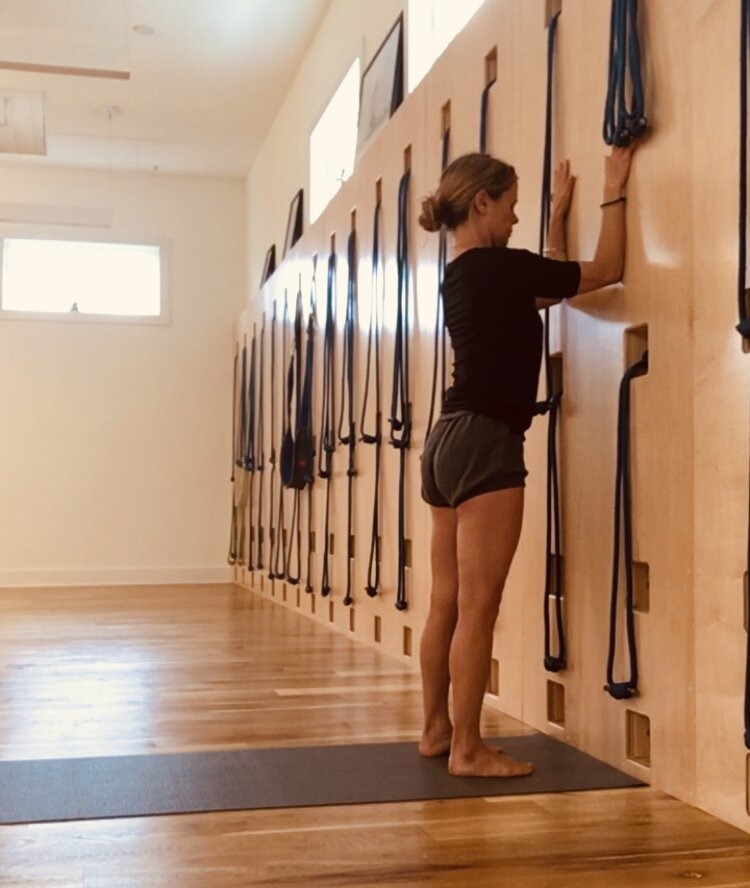
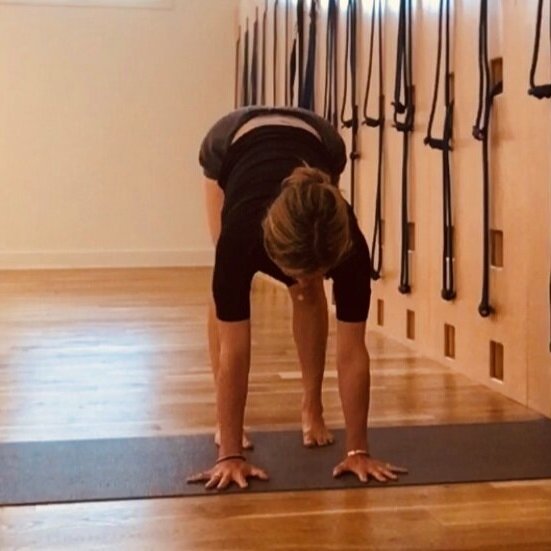
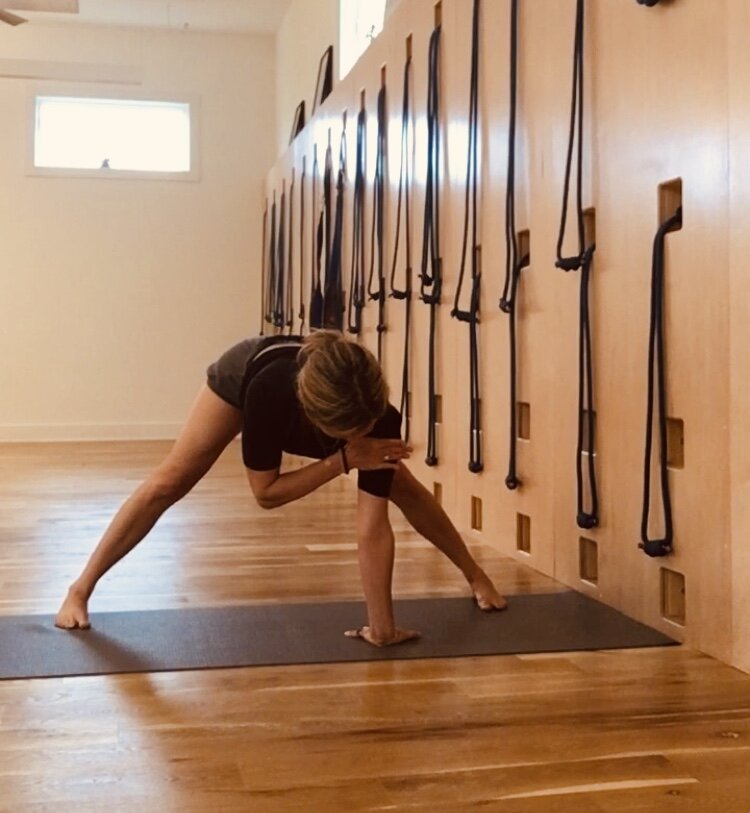
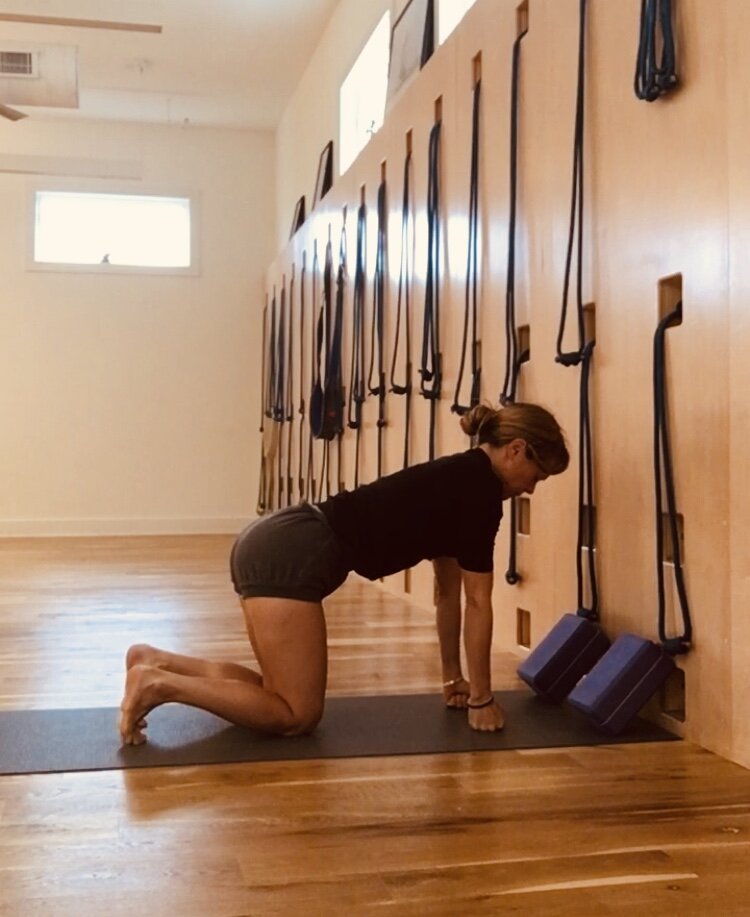
From here, try Chatturanga at the wall with the palms at the wall and then second place forearms at the wall as you might prepare for first stage of Pinchamayurasana. Here I place the palms in line with my chest at the wall shoulder width apart. I spread my palms into the wall and cut my outer elbows down towards the wall and in, so they are more in line with my sides/shoulders. I widen my collarbones and adjust the shoulder blades onto the back. In the second variation, I roll my outer elbow towards the wall and the outer upper arms down towards the floor as I widen and spread my chest:
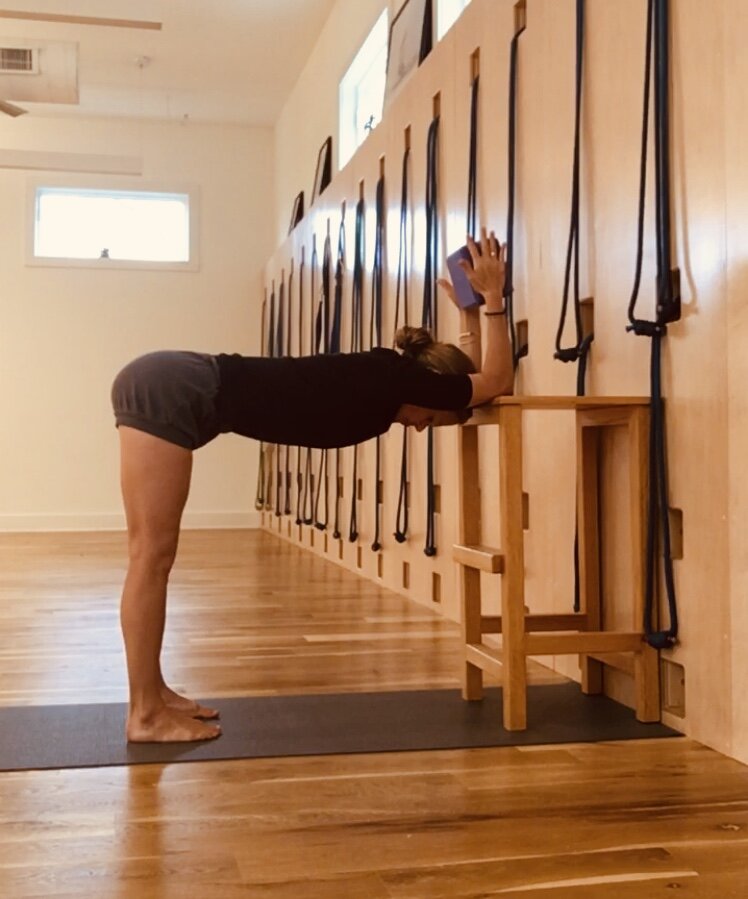
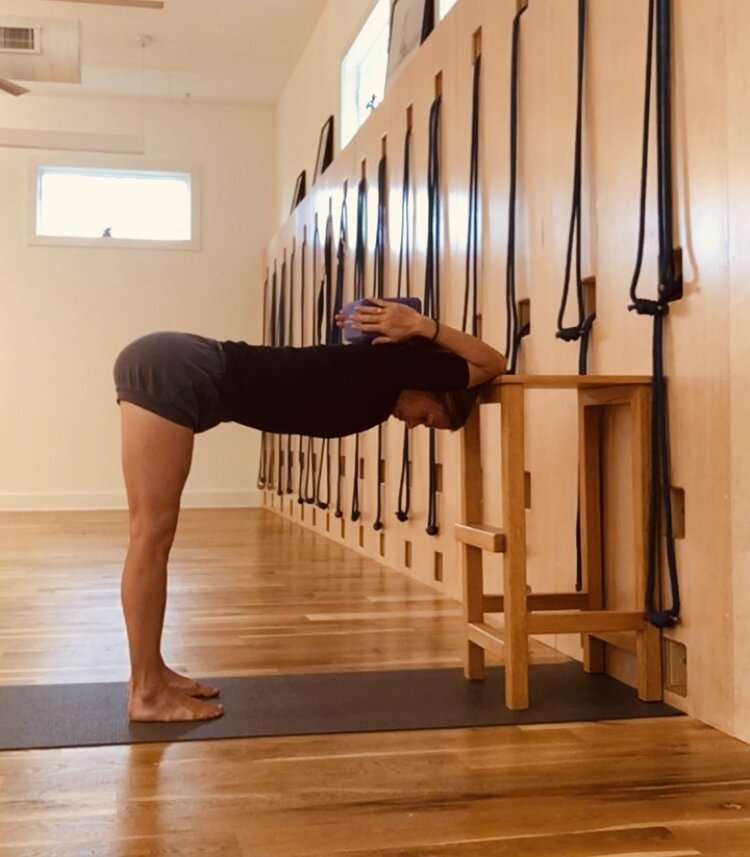
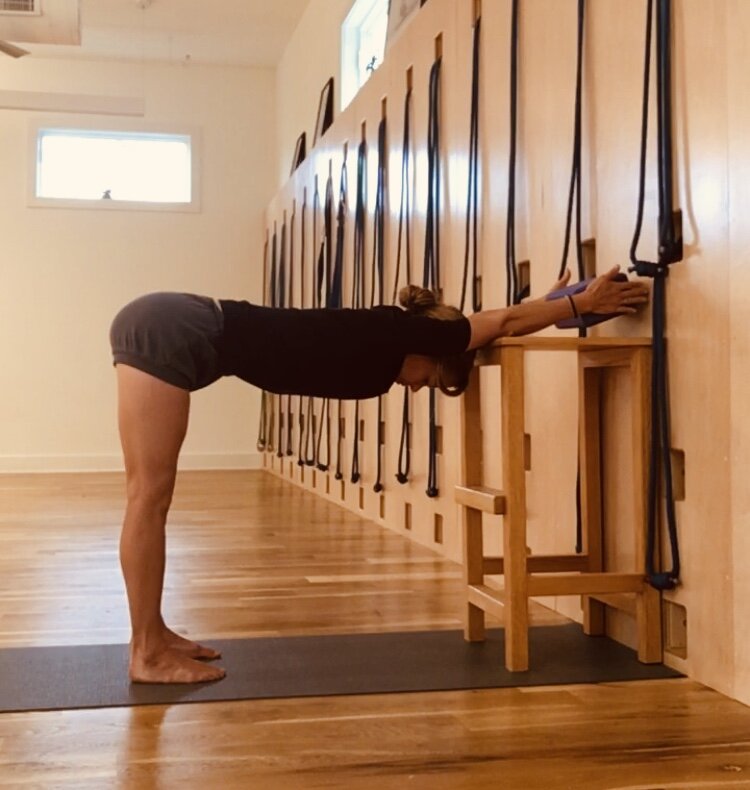
Now try Ardha Uttanasana on a stool, incorporating another way to work with the shape of Pinchamayurasana. I am using a stool but at home you can use your kitchen counter. I begin with my hands and wrists and a little bit of my forearm pressing down into the stool. The outer arms roll down towards the floor and the inner arms lift towards the ceiling. Then I place my elbows on the edge of stool and hold a brick between the wrist and palm (similar to Pinchamayurasana and the actions of last pose). Observe the variations:
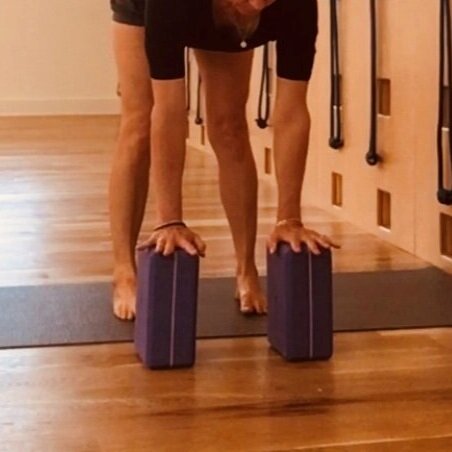
This next variation is also called Ardha Uttanasana but here the arms are down and in more of a weight bearing position. Here I move the inner arms move forward toward the wall in front of me and cut the outer arms back. The shoulder blades move in and down the back. You can use palms to the floor or hands on a brick depending on flexibility. Both are fine. Same palm rotations:
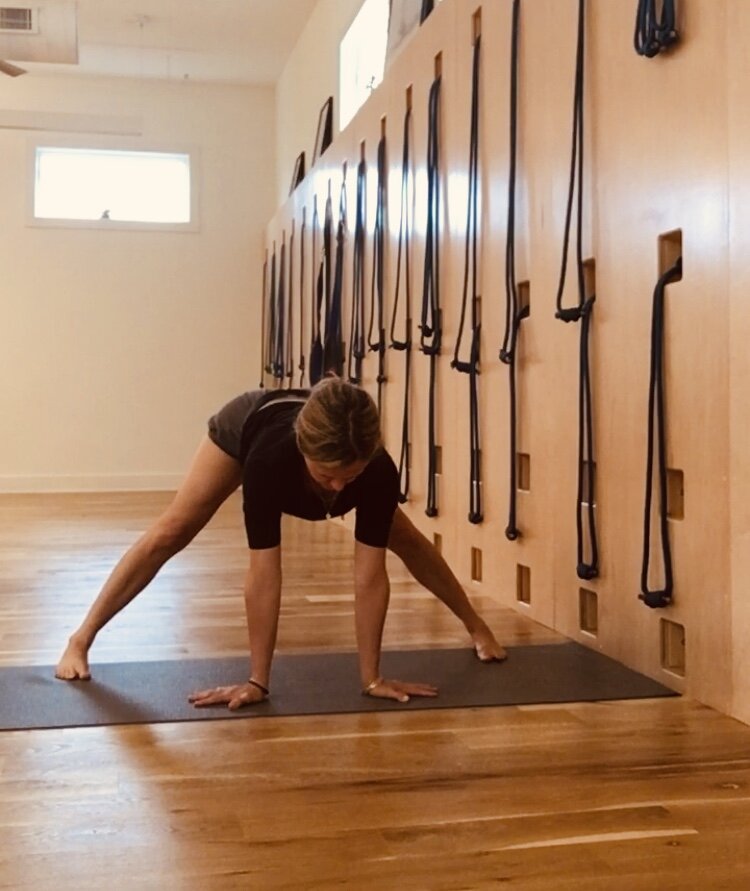
You can also do these variations in Prasarita Padottanasana (I am using my hand in the last variation simply to show you the direction the arm turns, the inner arm should follow the direction my fingers are pointing:
These next variations are much more load bearing on the shoulder and may not be possible if you have an acute shoulder injury. More seasoned students though who can do pain free may like to add these variations in:
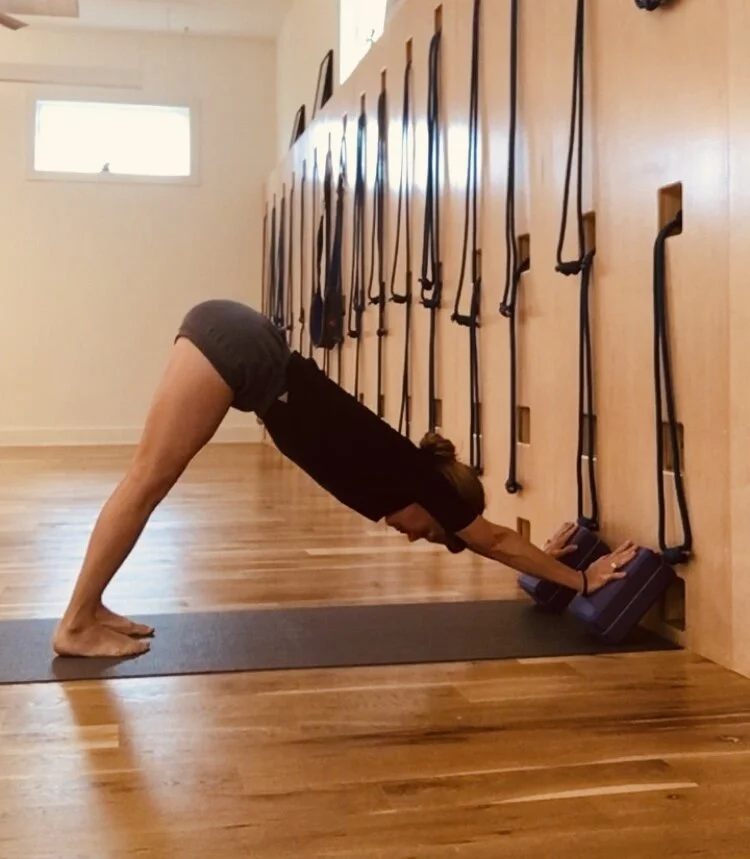
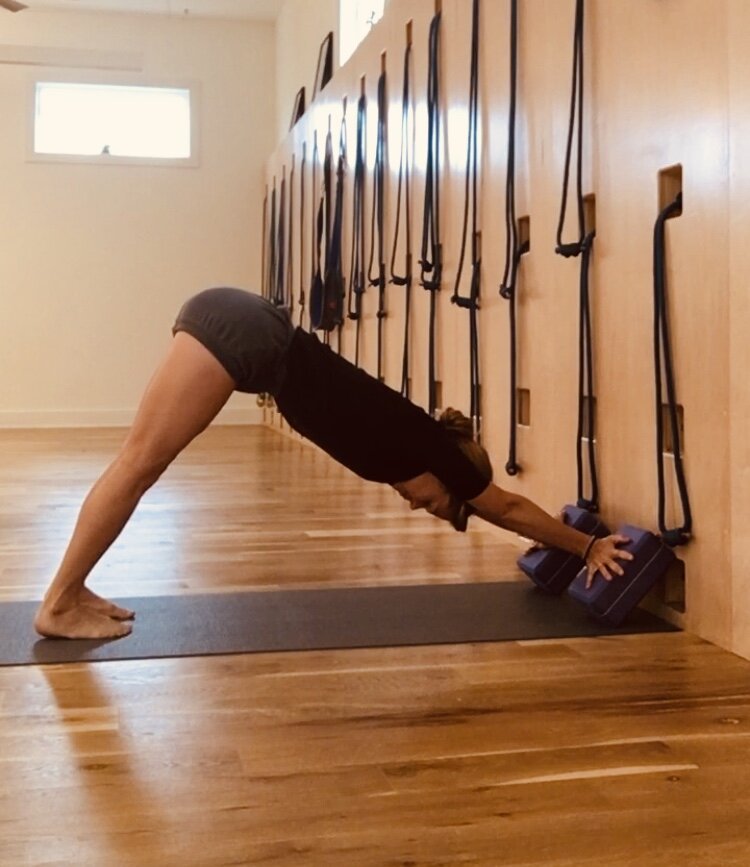
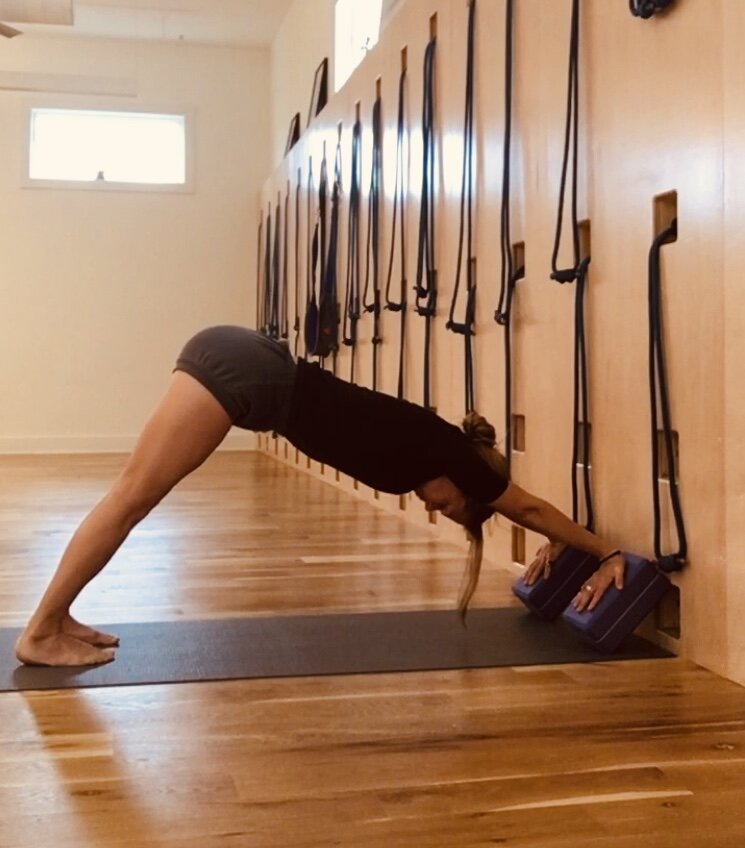
Adho Mukha Svanasana (downward facing dog) with hands elevated on slanted bricks
This puts the wrists and arms in a much stronger weight bearing state. Between attempts, you may need to rest. I like to make two fists and press them into the floor between attempts which helps take some of the strain of flexion out of the wrists
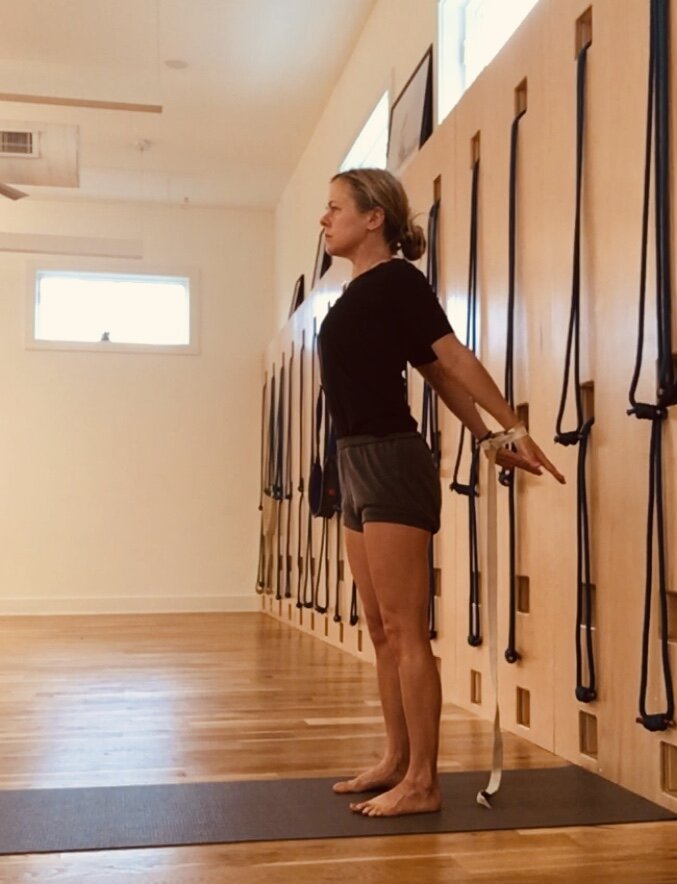
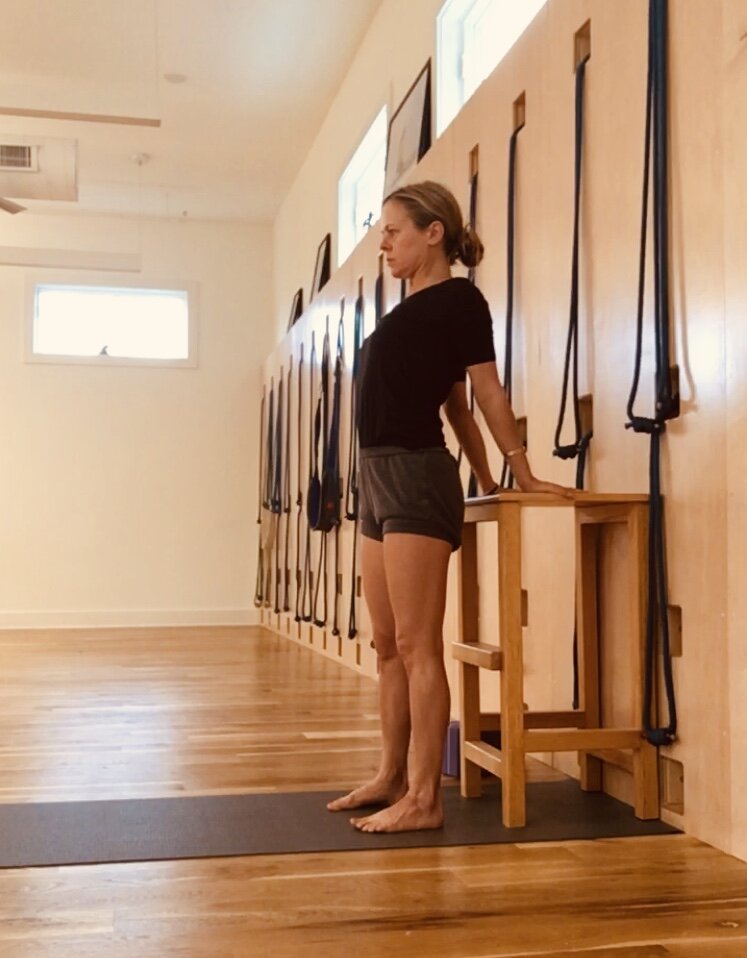
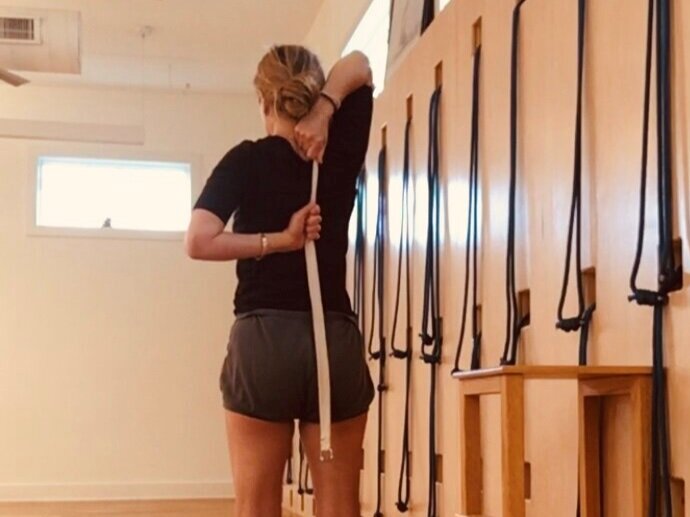
These next variations bring the shape of many of the baby backbends like Salabasana, Ustrasana, and Dhanurasana. There are many ways that you can work with the arm in extension. Here are a few, I begin with a simple belt around my wrists. The belt is the width measuring from one outer corner of my shoulder to the next. The second variation I am simply placing my hands on the stool behind me with my fingers pointing back. You can use a counter or low table at home. It is important that the shoulders roll back, that the chest lifts and spreads and that you keep the buttock rolling down and away from the back. Tadasana actions apply here and everywhere!:
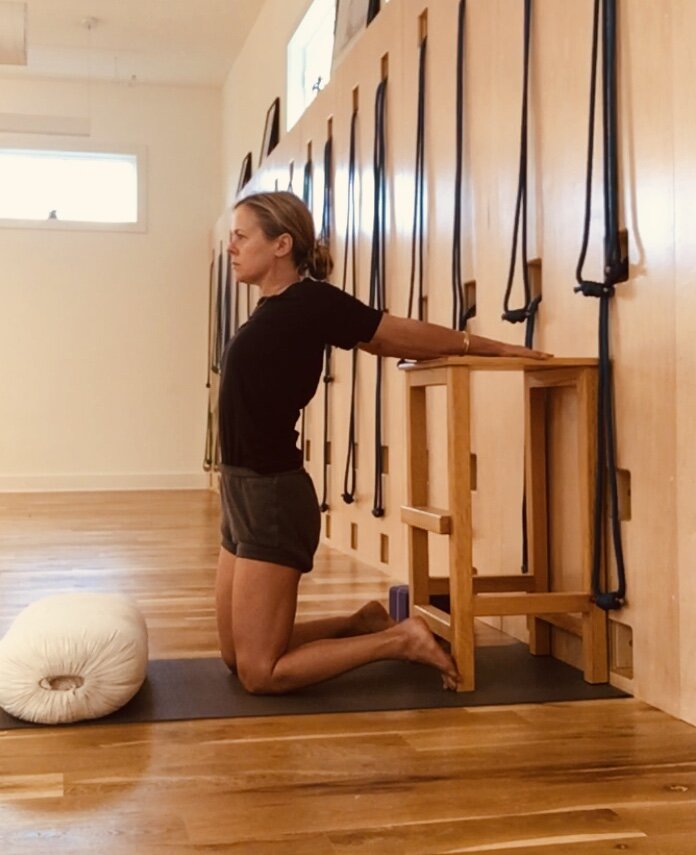
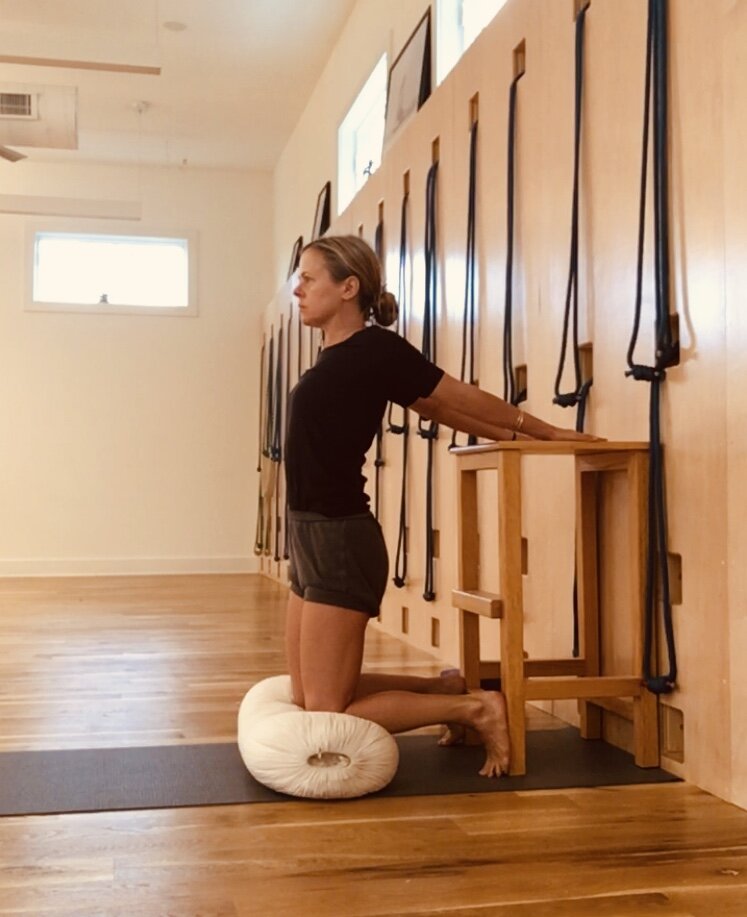
To intensify the stretch of the arm, I start by kneeling on a bolster and then to the floor, as I go lower, my arms are lifted higher:
At this point, try Baddha Hastasana see what freedom is there:
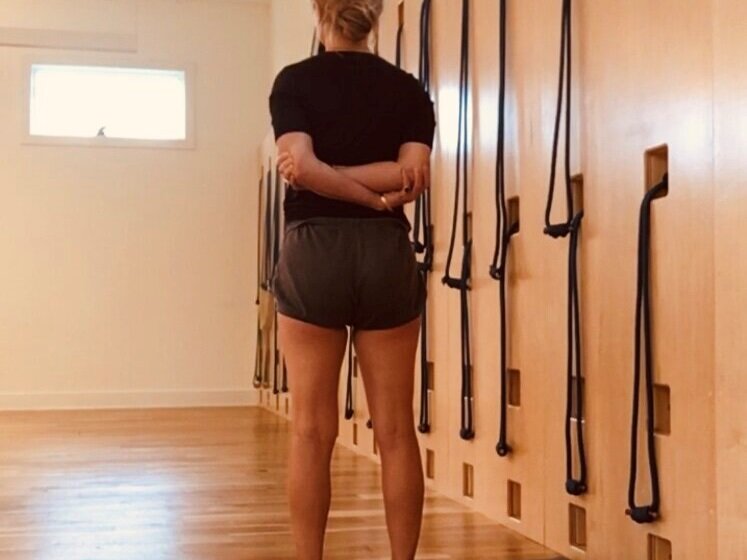
Then try Gomukhasana arms:
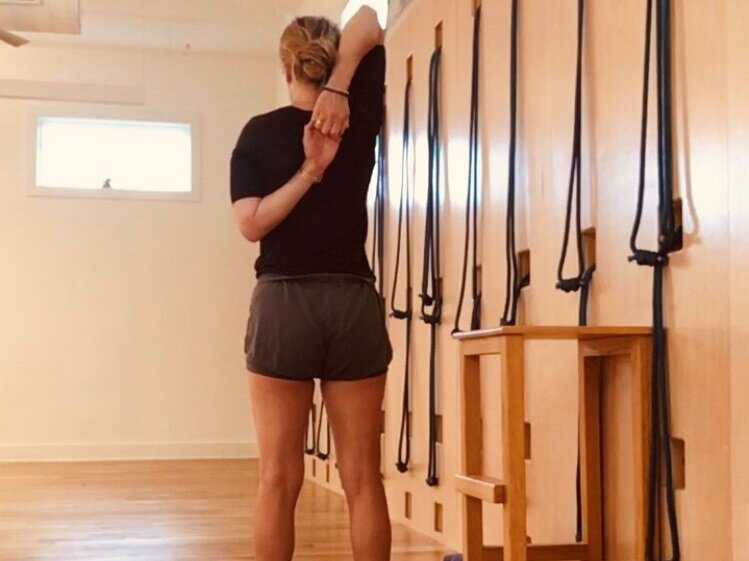
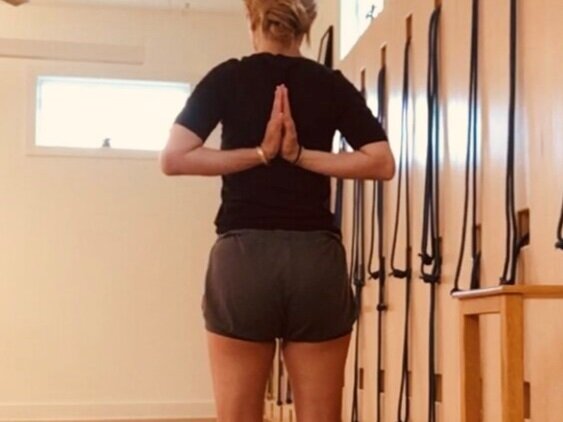
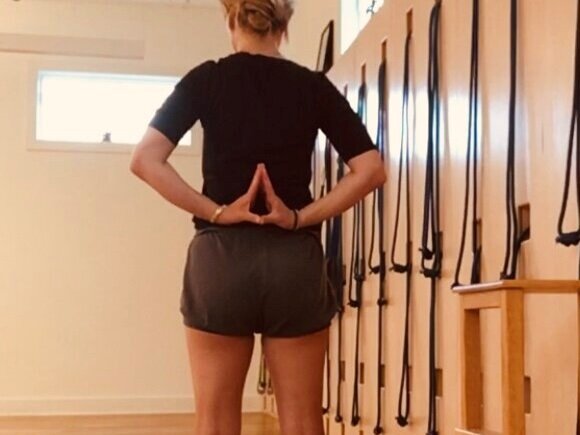
Lastly try Paschima Namaskar (hands in prayer to the east):
Hopefully at this point you are finding some freedom and circulation in the shoulder, upper back, and neck. You can start your practice and let it carry you in any number of directions!
Aum Peace, Peace, Peace
These sequences are free and open to the public. If you find our home practice resource page useful and feel inspired to donate through the link below as we are closed for covid, please do. We certainly hope this blog is inspiring your home practice while we are apart.