
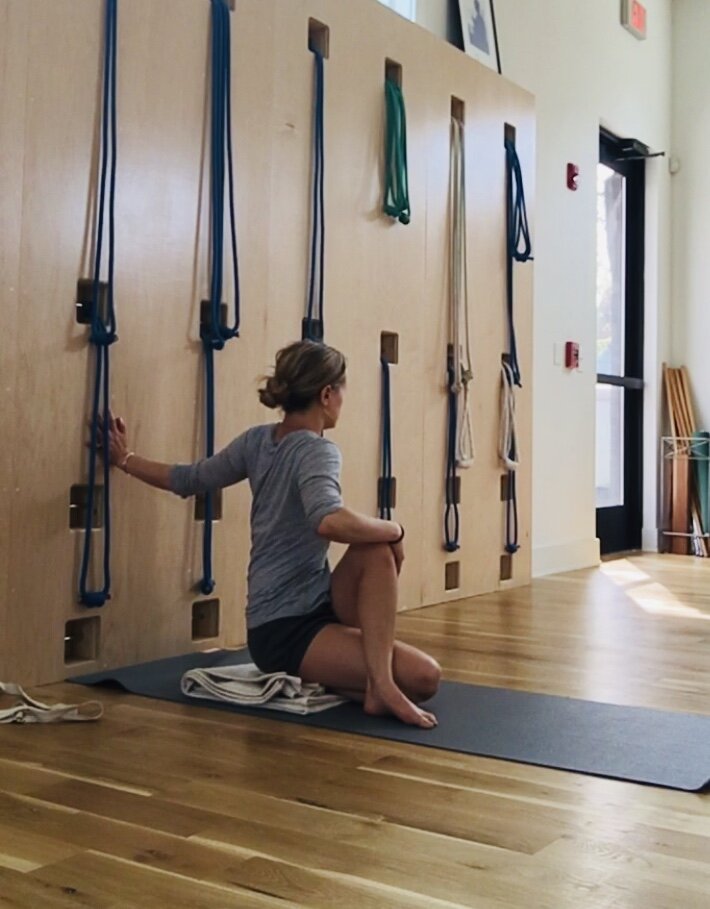
Seated Twists and their evolutes (for Intermediate students)
I love the seated twistings. I love all of them. They are rejuvenating and a reservoir of vital energy. This is a twisting sequence for students who have a regular practice and deep familiarity with forward bends and the seated twists mentioned in the sequence for beginners.
Again, this is an incomplete sequence. Intermediate students might begin with the following: Utthita and Parivrtta Trikonasana, Utthita and Parivrtta Parsvakonasana, Prasarita Padottanasana, Parsvottanasana, (can add in a few repetitions of the following: Adho Mukha Svanasana, Chatturanga Dandasana, Urdvha Mukha Svanasana) Sirsasana, Adho Mukha Virasana and then pick up the following poses from there.
Seated twists are a great segue into arm balances (I include a few for fun) and also a great segue into some of the knotted poses such as Eka Pada Sirsasana which I also include here. Do as many of these postures as you like. You can certainly omit poses from this sequence as well.
A few general tips. While sitting, the arms and legs are still vital tools. There has to be intelligence in the limbs as they inform the lift of the spine. The grip of the outer hips should aid the lift of the lower spine but not harden the abdomen. The abdomen should remain soft so that the twisting action can deepen. Learning to balance effort and ease is essential and comes with practice. In all twists, the inhalation breath is a tool to bring elongation to the spine, to lengthen it before twisting action. The exhalation breath is a tool to aid the turning. Its nature is to contract. I cannot give all the actions, but you have a lot of memory stored. Once you start practicing, many of the instructions from class will come to you.
In terms of challenging yourself to take a step further. Don’t be intimidated by trying something new. Guruji writes in Light on Life the following: ‘You have to ask yourself, can I do a little better than I am doing? Light comes to a person who extends his awareness a little more than seems possible. We limit ourselves by settling. We say, ‘Oh, I do not want to go beyond this, because I know this is good.’ This is living in one’s old mind. Question whether you can do a little more. . . .If one keeps one’s aim to the maximum, Self-knowledge will come. I say this because your mind and intelligence move deeper toward the inner body, bringing the mind closer to the Self- the core of being. The moment one goes a little more than the body wants to take, one is nearer the Self.’
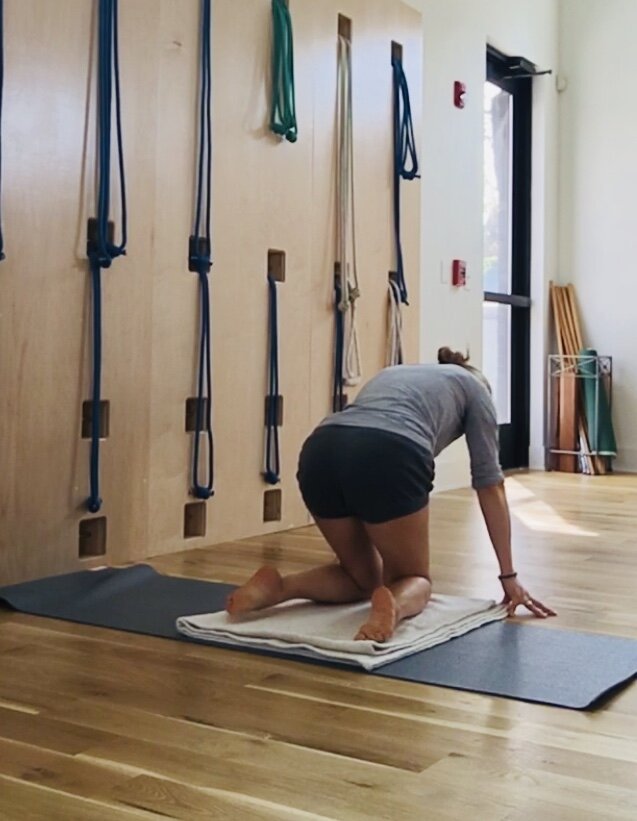
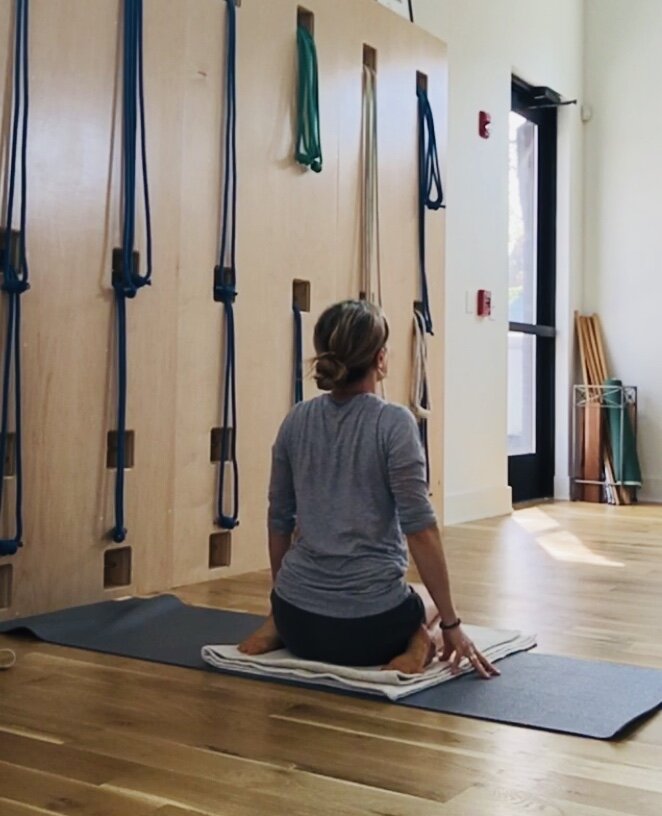
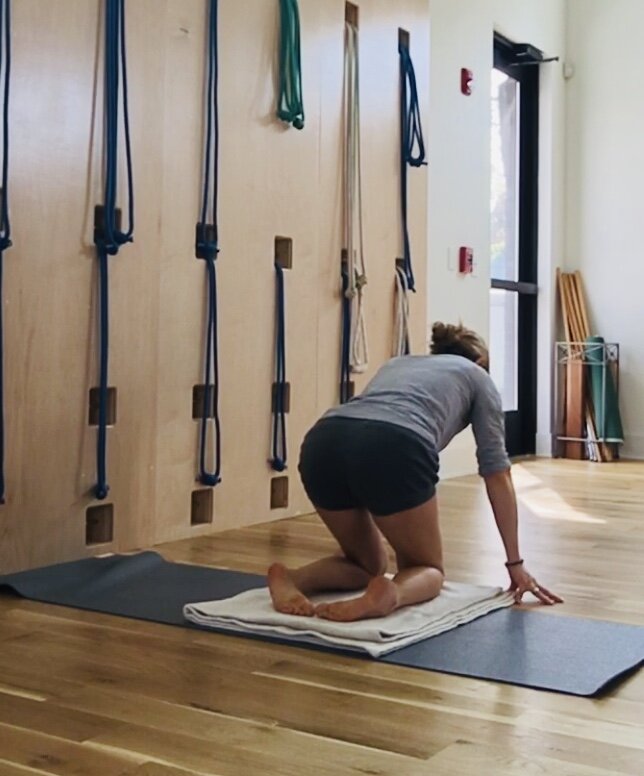
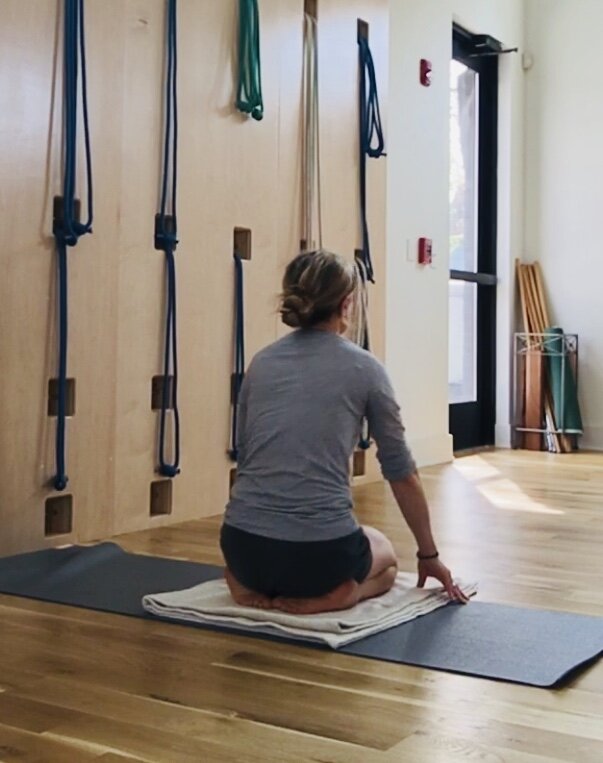
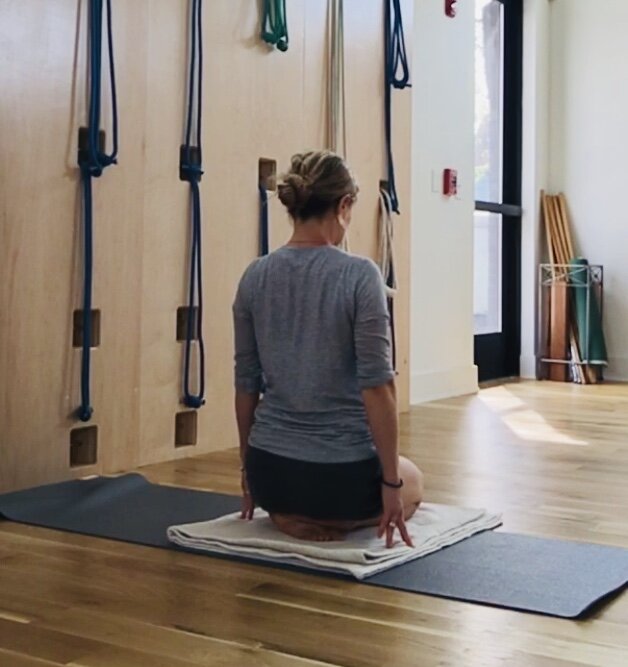
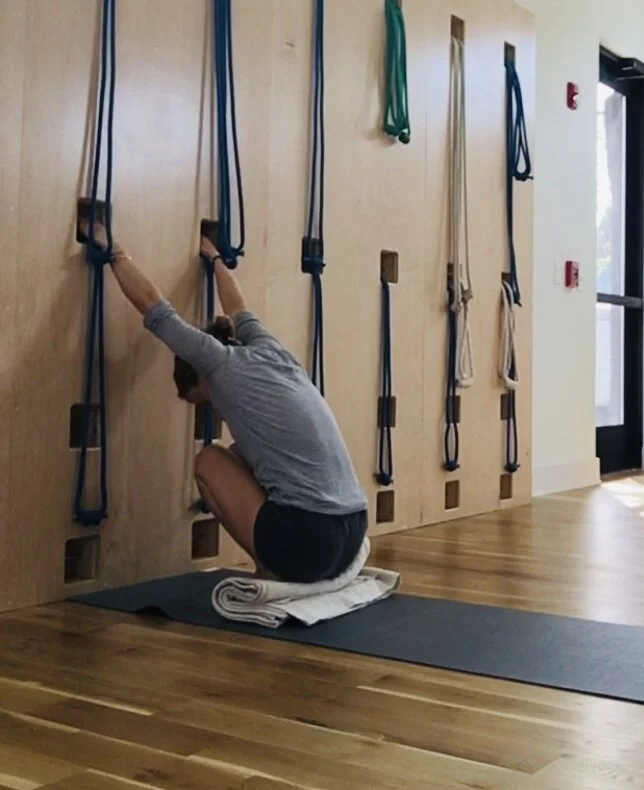
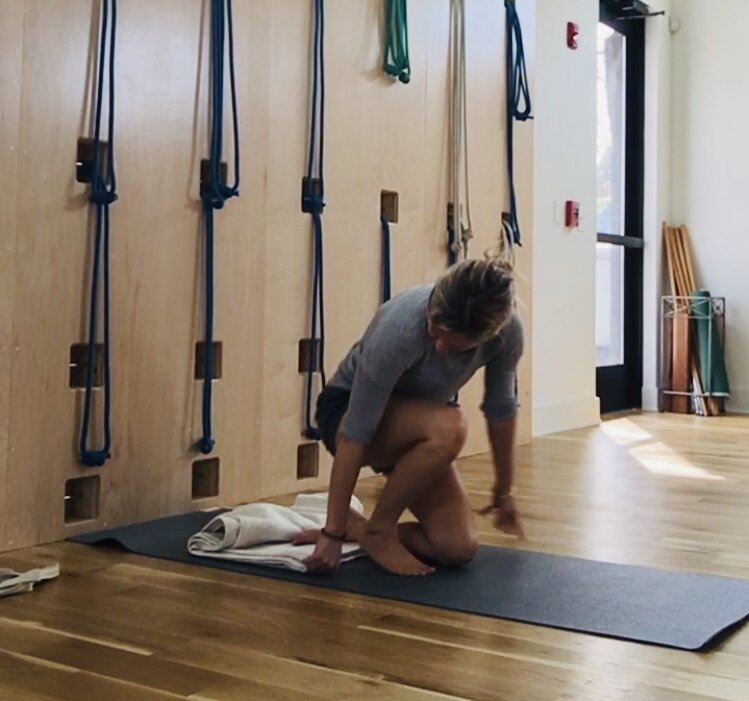
Seated Virasana Cycle: this is good for beginner and intermediate students. Intermediate students should practice regularly until the foot positions come with some ease. Fine to use a folded blanket behind the knees:
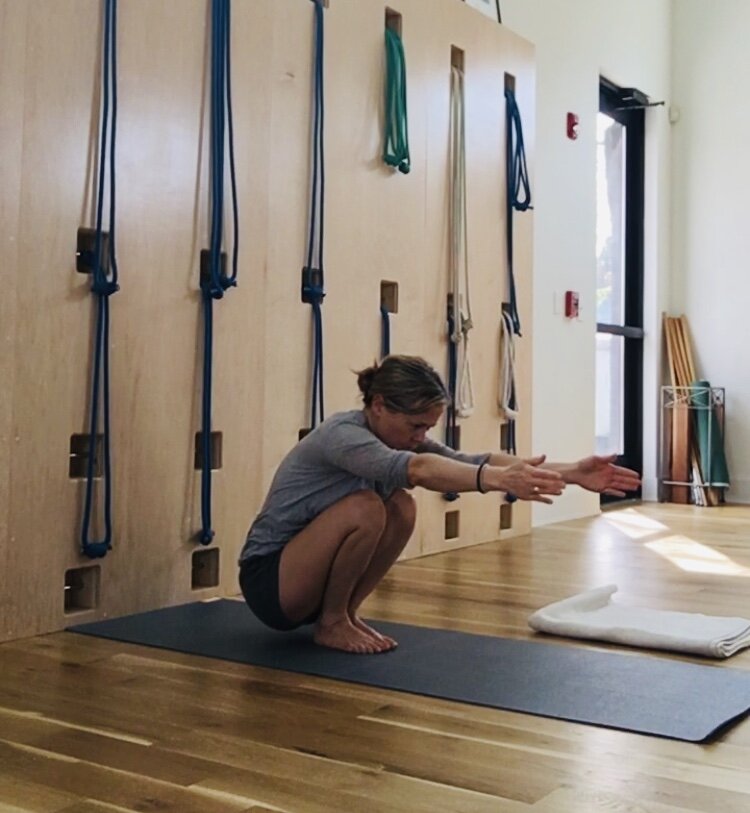
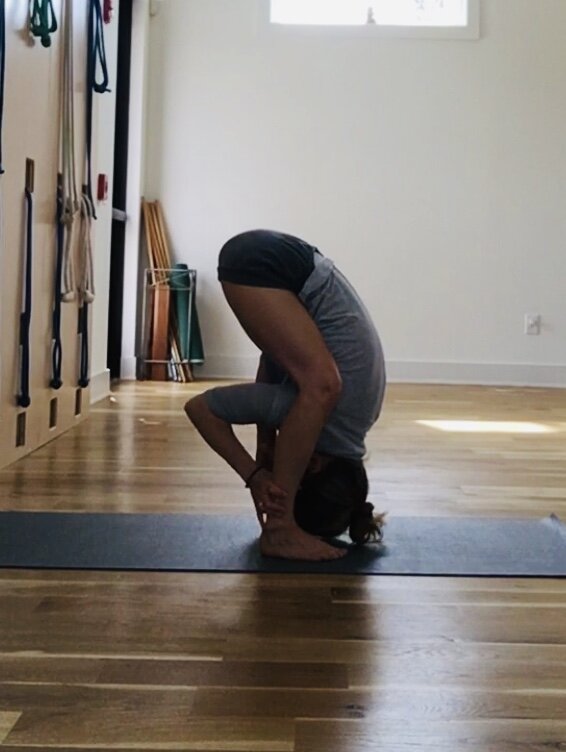
Malasana (garland pose) I am showing a few options. If the body is stiff, take support for your first few attempts and then try the classical pose. In each attempt, see that the feet are evenly spread and that the knees track evenly. The knees/thighs can come slightly apart but don’t let one knee fly off to the side. Keep the knees/thighs in line with eachother.
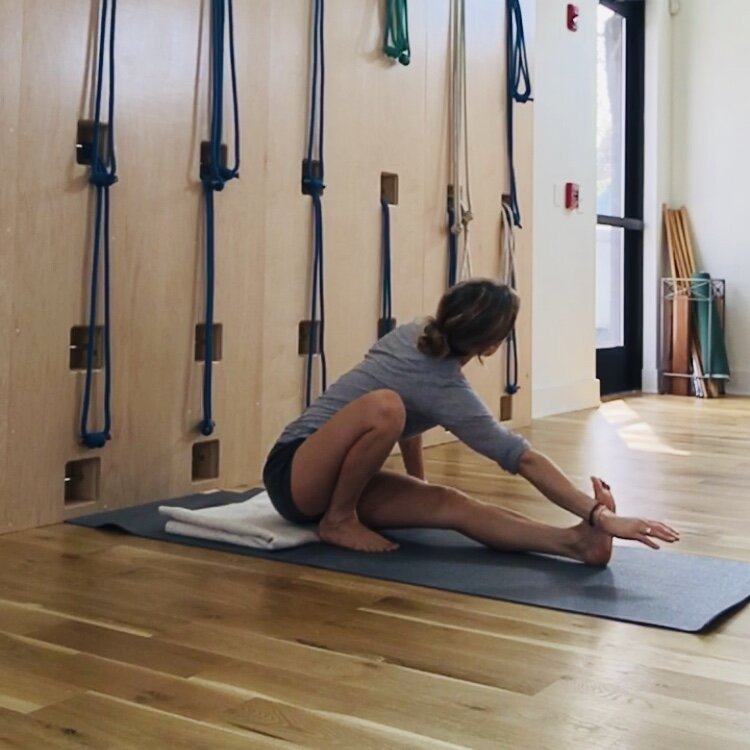
Paschimottanasana (intense stretch of the western side) This is the final stage, but do go through the concave stage and do several repetitions as needed.

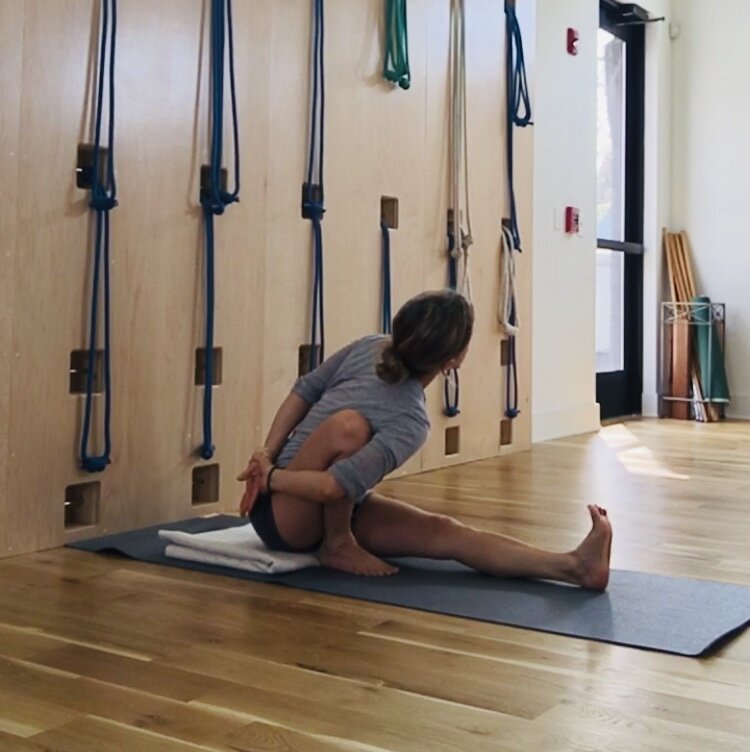
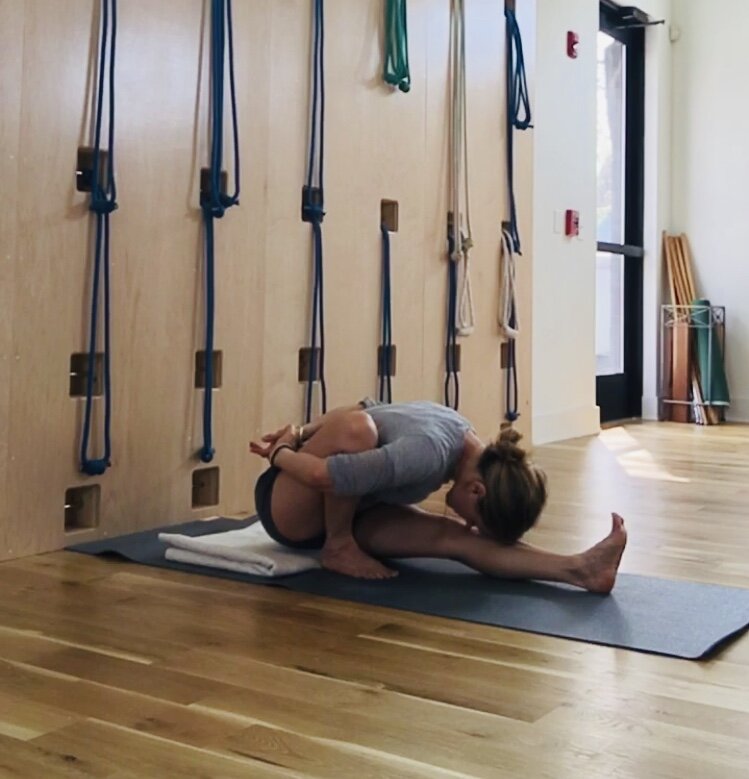
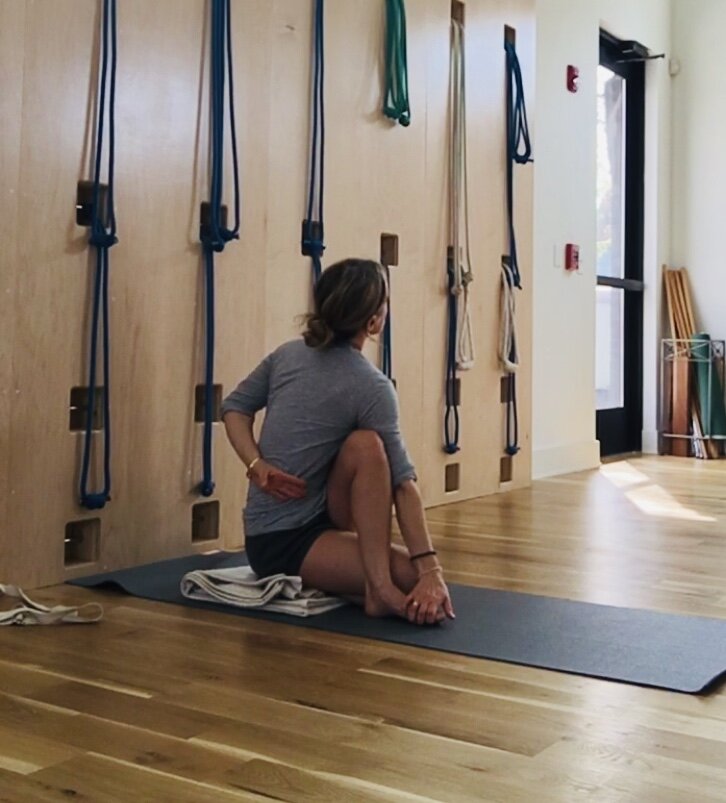
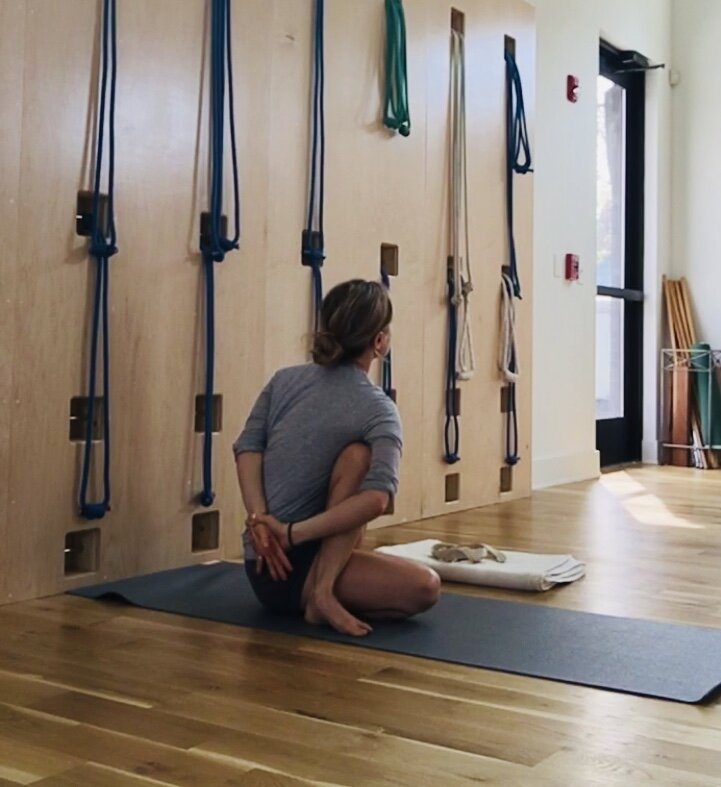
Marichyasana I (Pose dedicated to sage Marichi) Do in stages. Each stage has value. In the first stage as the elbow presses into the knee and the knee presses into the elbow you are establishing an important relationship for all arm balances. The straight leg should be firm and centered. In going for the clasp, you have to reach forward maximum like paschimottanasana and really bring the torso close in contact to the inner thigh. Once you clasp, there has to be a strong grip to the bent leg thigh into the arm. The upper arm should push the shin slightly back to get more of the torso in front of bent leg. Then with a sharp exhalation the head can come down.

Ardha Baddha Padma Paschimottanasana (half bound lotus forward extension) In this pose, if the shin/thigh of the lotus leg is up, sit on more height and support the leg with a folded blanket (not shown). If you cannot catch the foot, you can omit the clasp and/or use a belt around the foot as an extender (not shown)
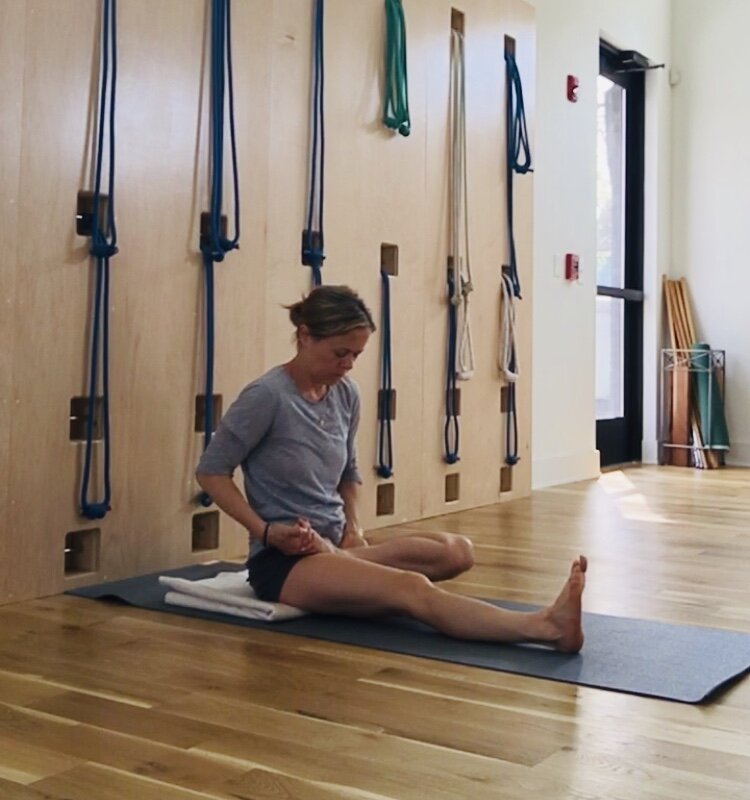
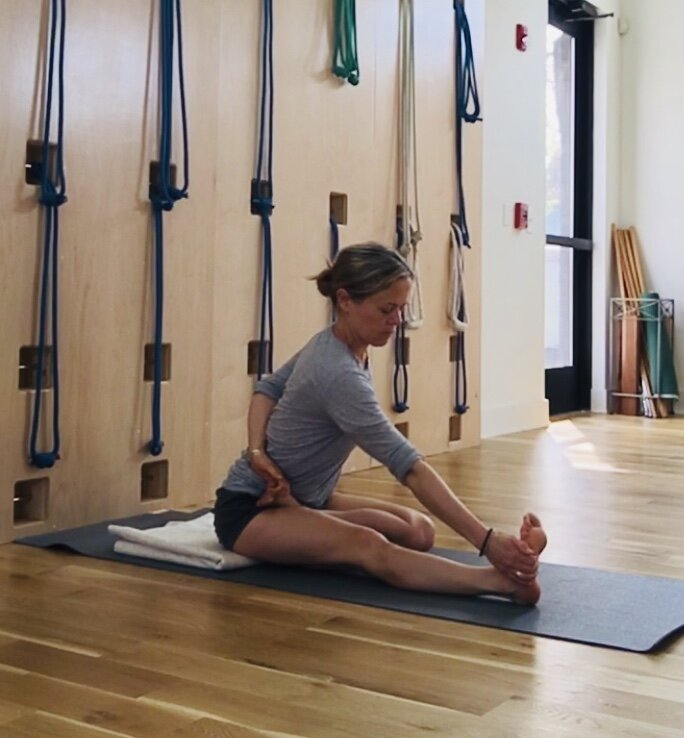
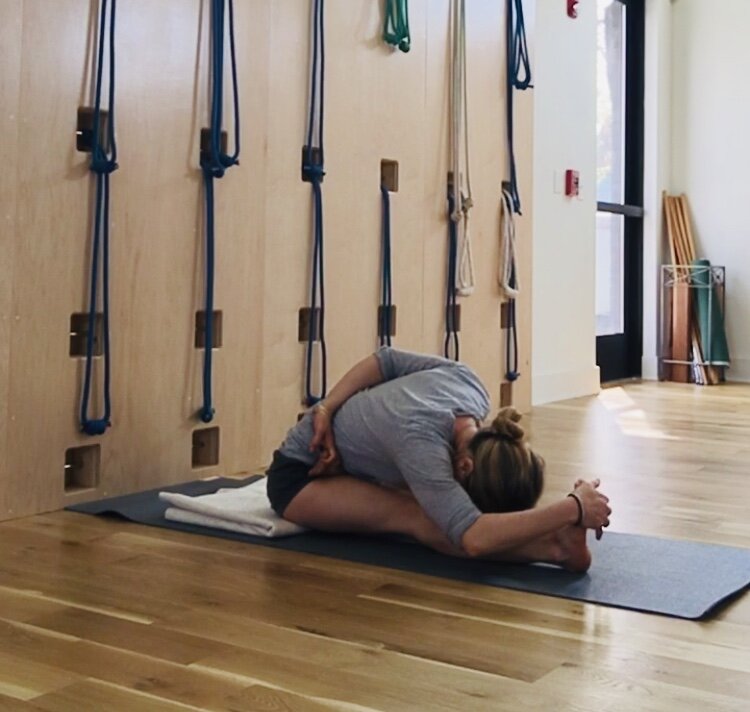
Marichyasana II (pose to sage Marichi variation 2) This is a combination of Marichyasana I and Ardha Baddha Padma Paschimottanasana. In order for this pose to come along, you need to be adept at those two earlier postures. If you find this pose challenging, go back to the earlier poses and improve them first. Now, to begin, start as in the last pose, taking one leg into Half Lotus. Now, if the lotus leg is quite high, lean a little to that side to see if you can get the leg to release down, if you cannot, you can do this pose with the leg as in Swastikasana rather than half Padmasana. See the last image below. Once the leg is in Padmasana, take the opposite leg as in the bent leg of Marichyasana I.

Once you have the legs position established, then take the stages as you did in Marichyasana I, first making the bind and then folding forward. The Padmasana knee should not pop up, if it does, take the legs as in Swastikasana. The leg that is bent as in Malasana has to grip in to the body, don’t let it fall off to the side. The grip that you learn to the outer hips in standing poses comes in handy here!


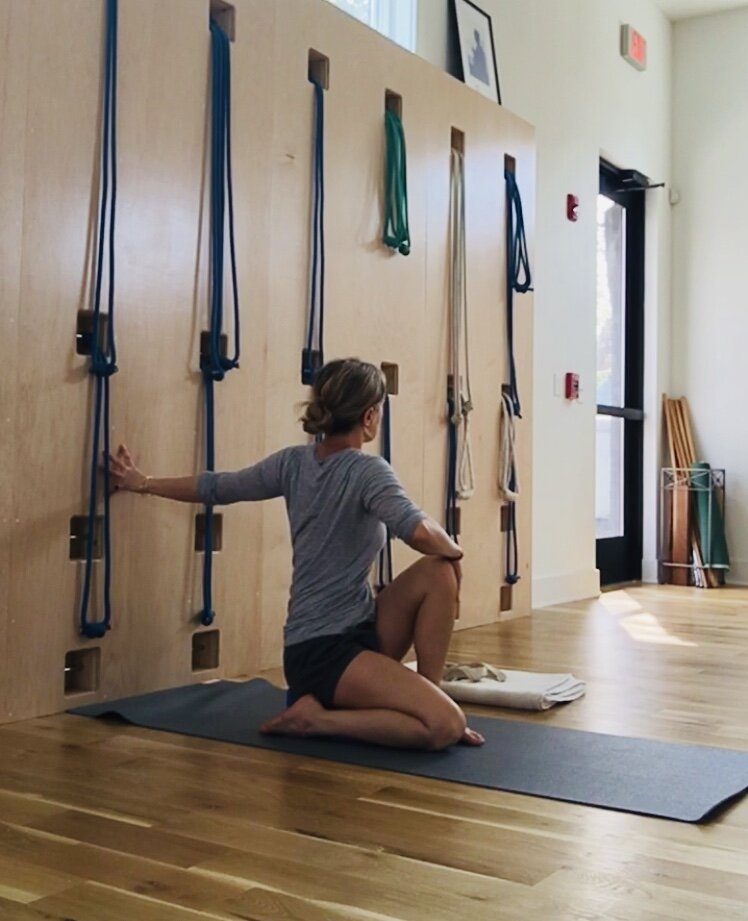
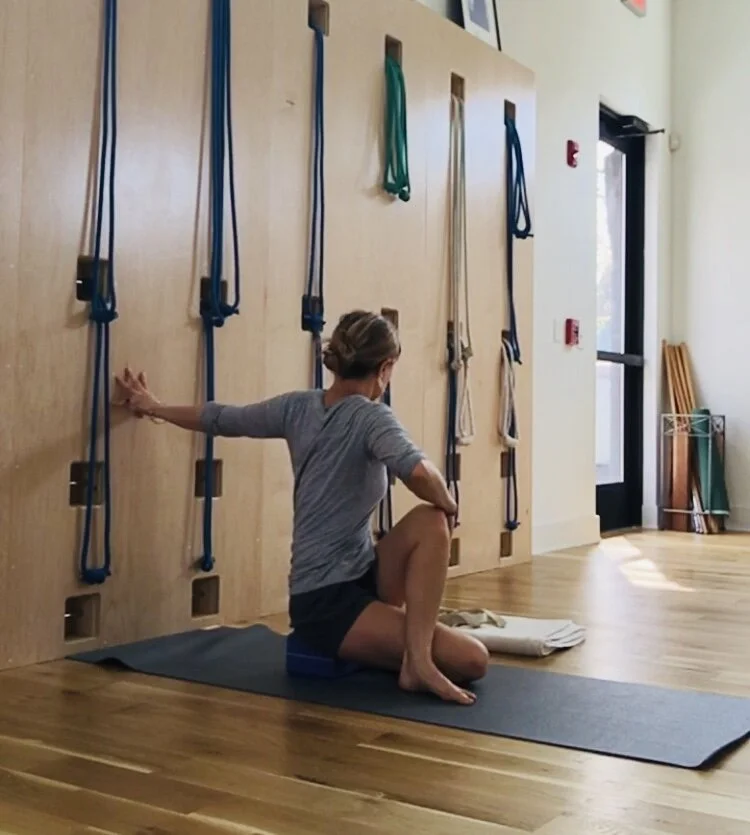
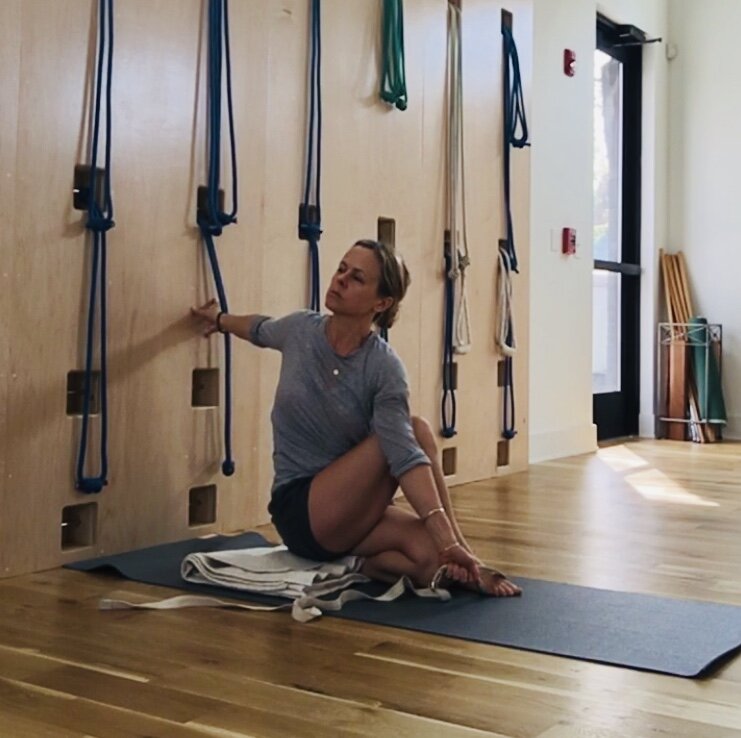
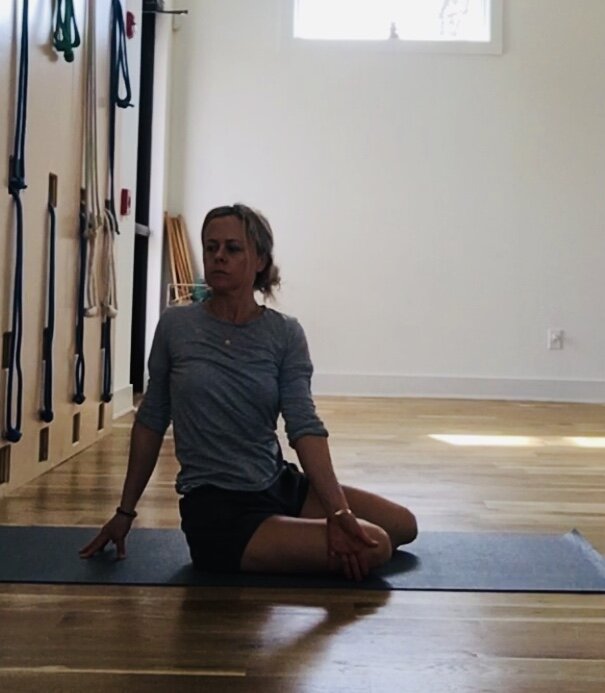
Marichyasana III, take this pose in stages and do several repetitions. In stage one, where I am just clasping with the hand, that is the best stage to get the turning of the lower abdomen. Suck the outer hips in and roll the lower abdomen towards the bent leg. When I hook the elbow, that gives me more leverage and turn to the upper abdomen and lower back waist. The clasp gives a good turn to the upper thoracic. In this way, each stage helps you go deeper into your twist.
Marichyasana III alternatives
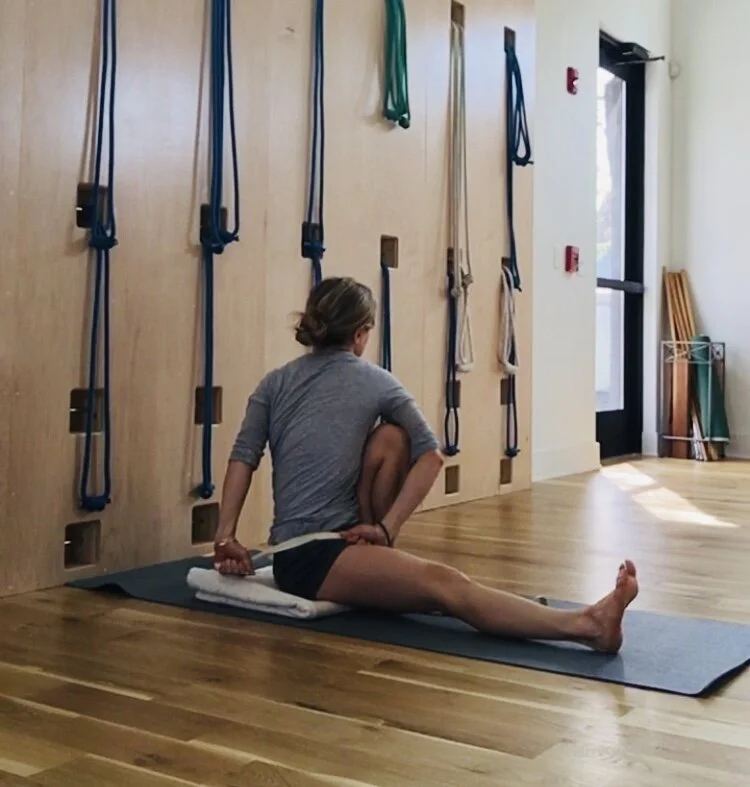
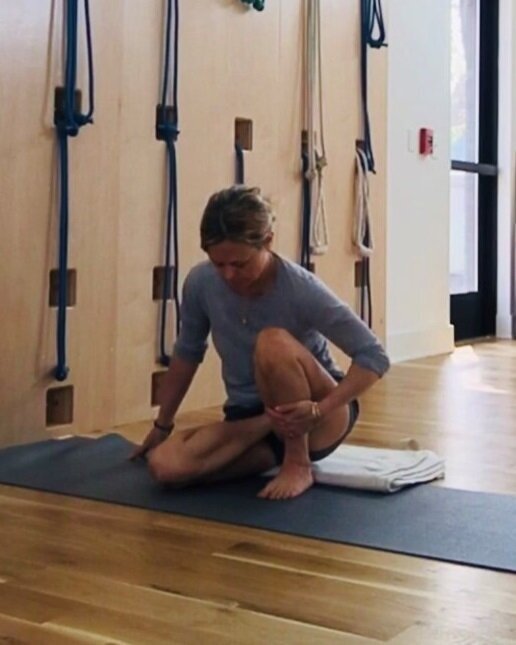
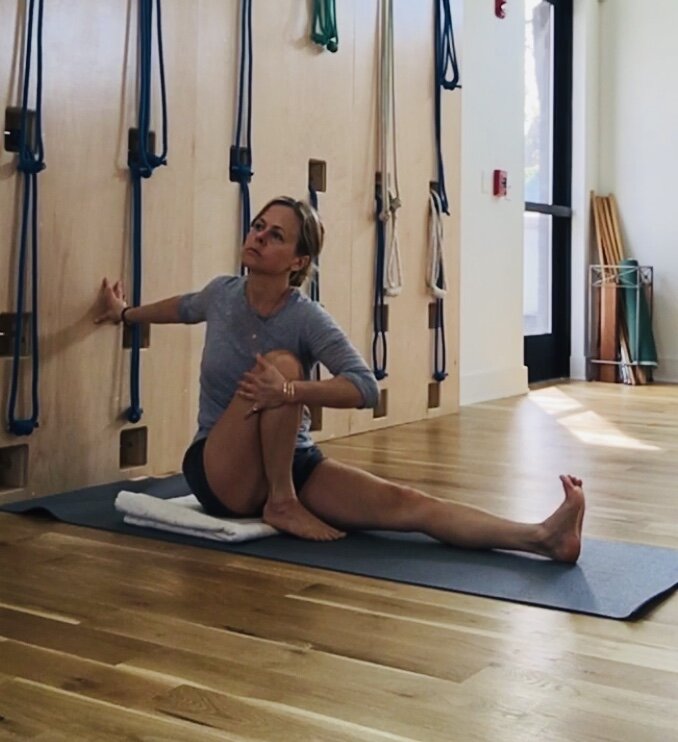
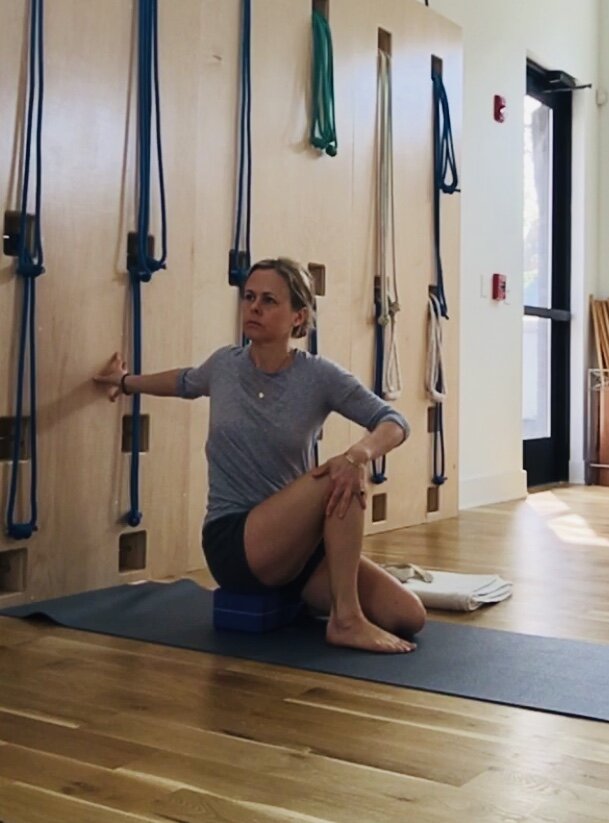
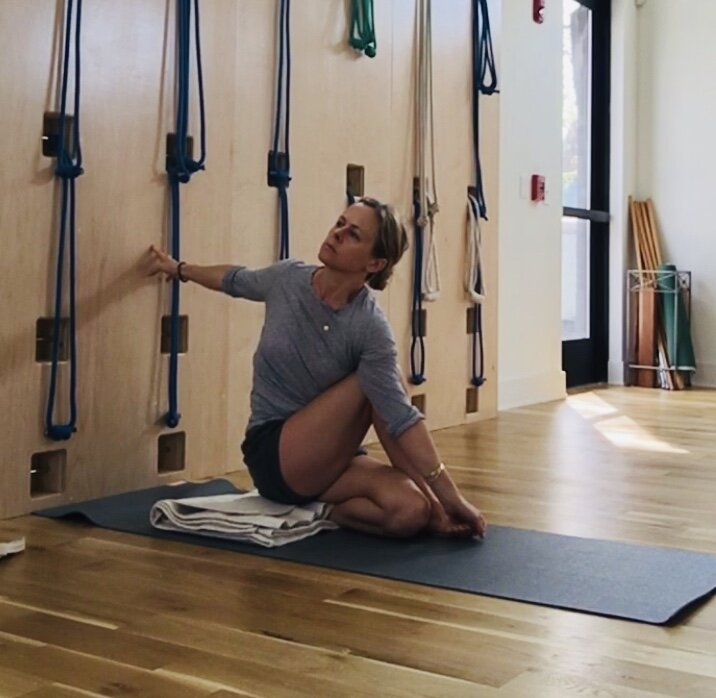
Ardha Matsyendrasana I (Half Lord of the Fish pose) I am starting here with a few alternatives for folks with knee issues or who find it difficult to cross the leg over. Sitting on brick is a wonderful option for anyone with knee pain. You can also add a folded towel behind the back of the knee.

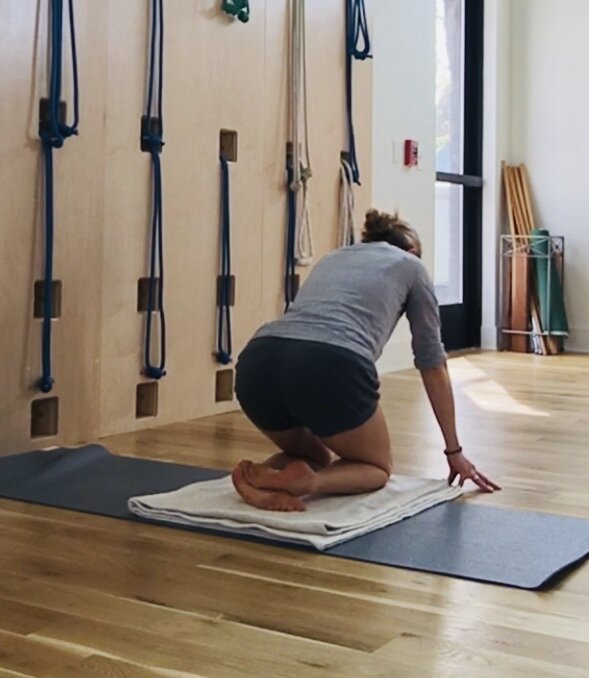
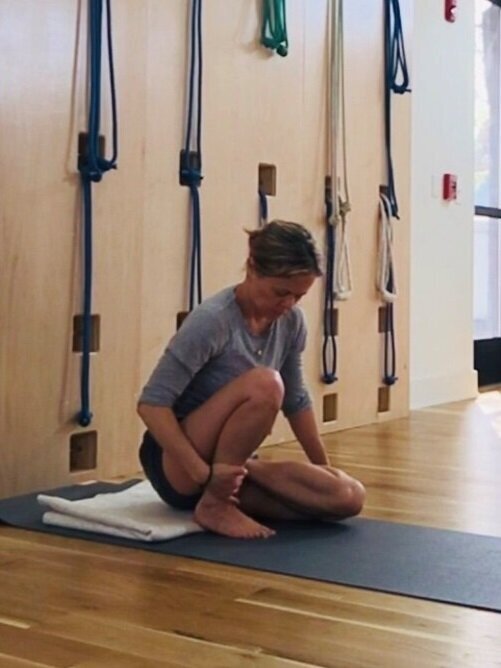
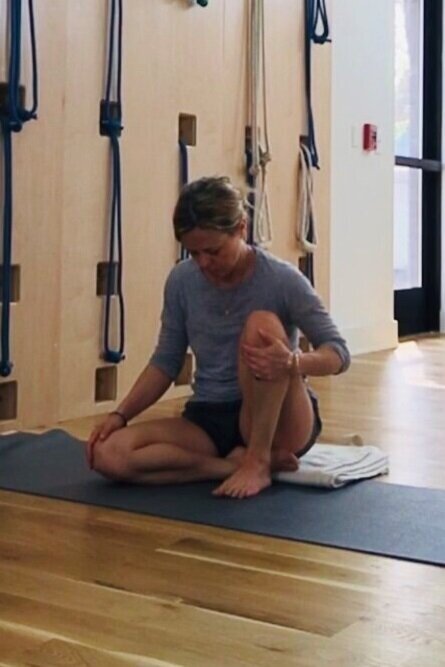
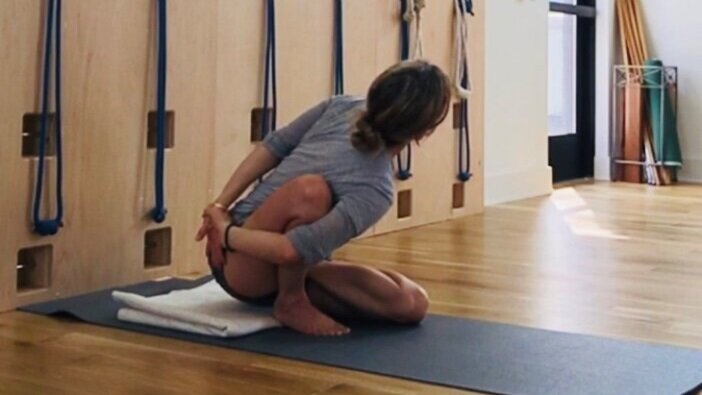
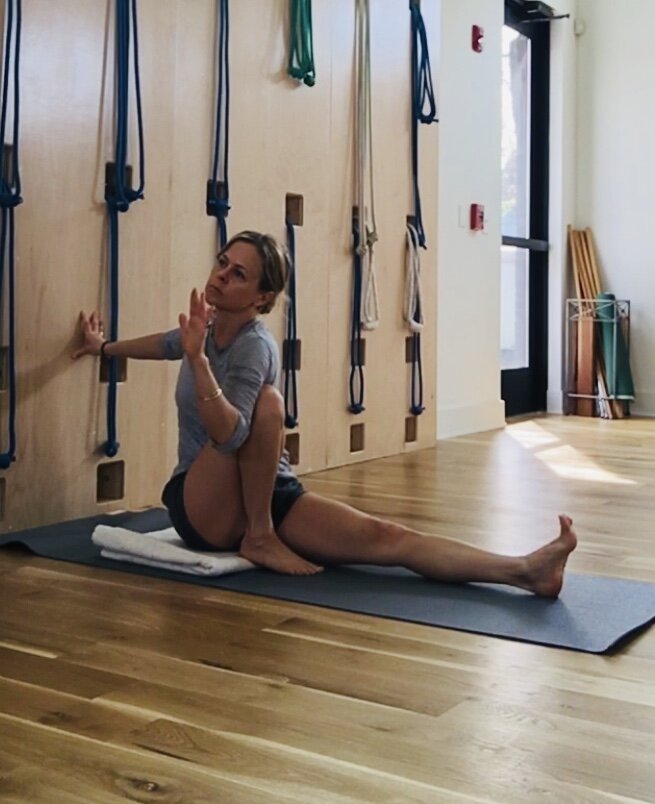
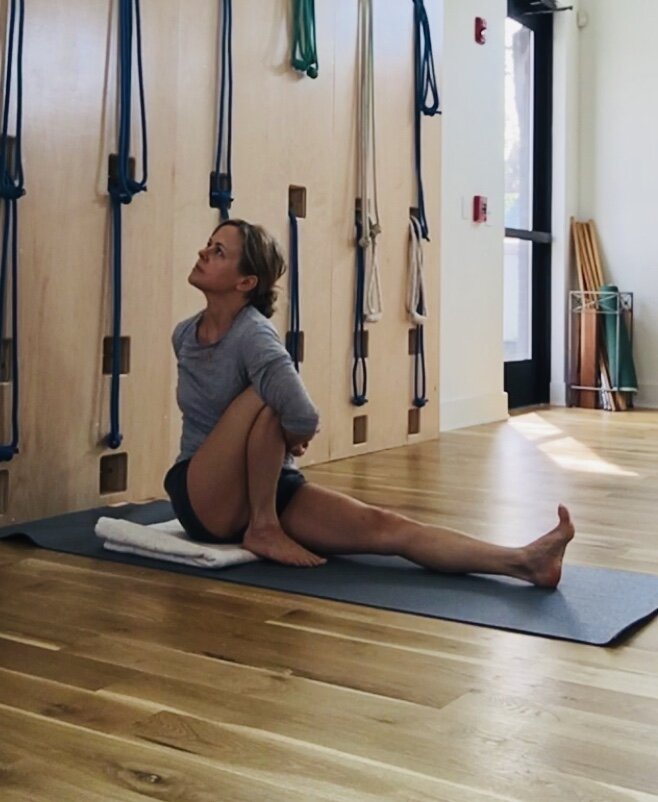
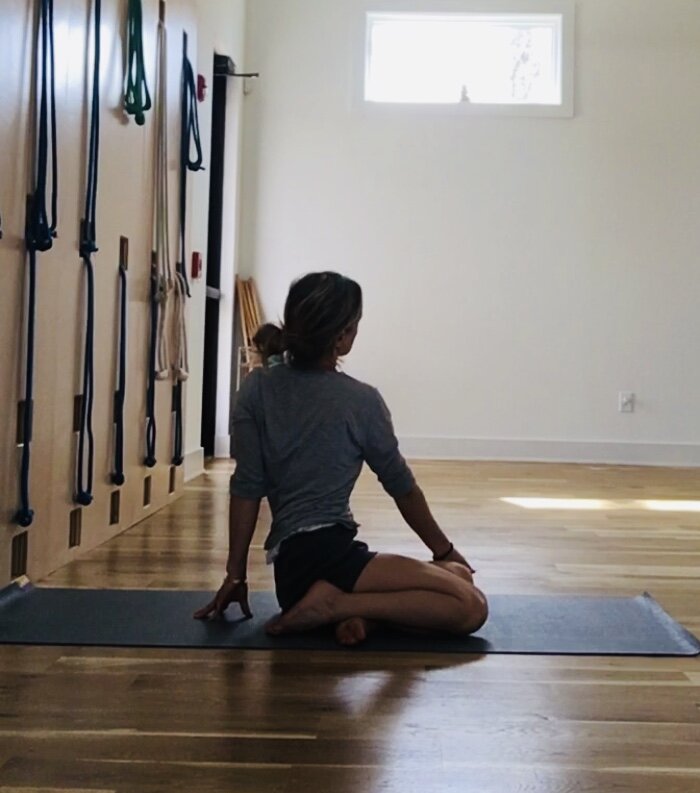
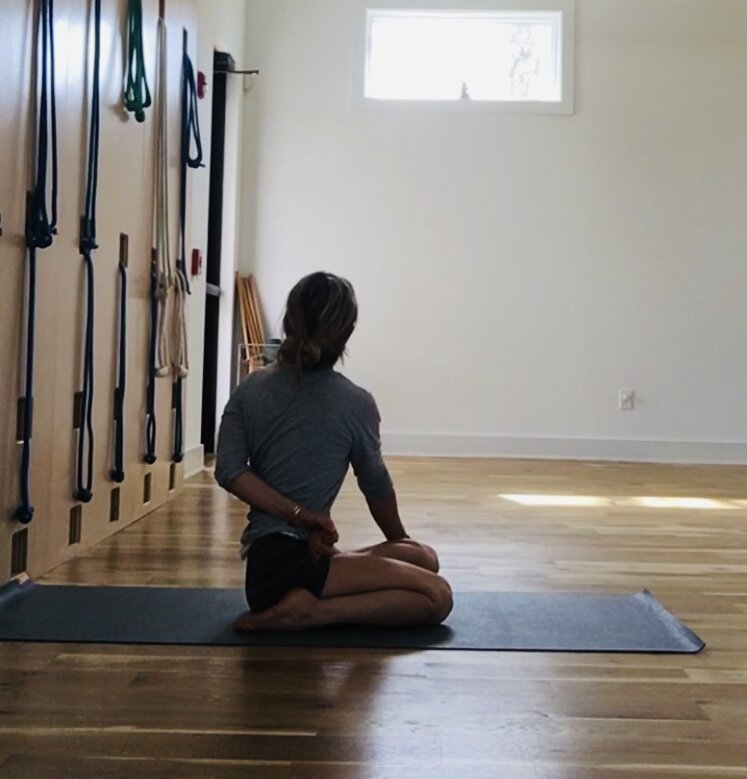
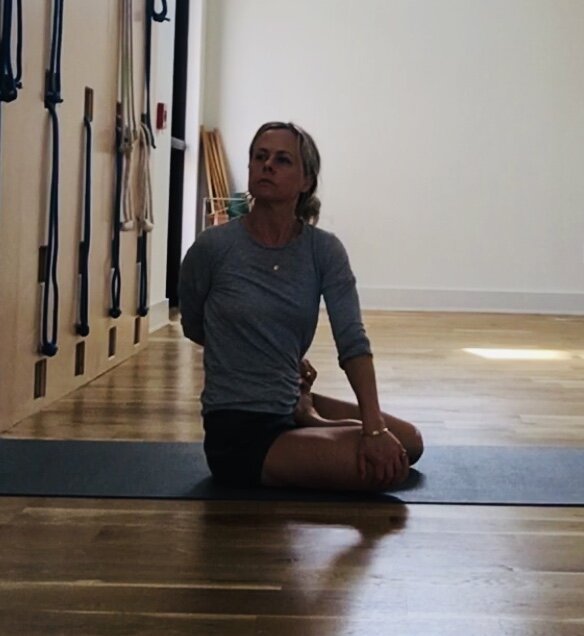
Ardha Matsyendrasana I full pose in stages. I like to use a folded blanket to pad my foot. You can see how I am placing my foot between two blanket folds. The foot that you are sitting on is the same foot of the Virasana cycle last stage. The foot should rest laterally on its sharp edge placed under the buttock bones. Once you cross the top leg over, the foot of the top leg has to wedge tightly against the bottom leg thigh. I grip the outer hips in, and see how I follow the same stages as Marichyasana III. It is useful to do each stage as a repetition so you are getting in several attempts. Again, each stage helps a different part of the spine to turn. Observe that.

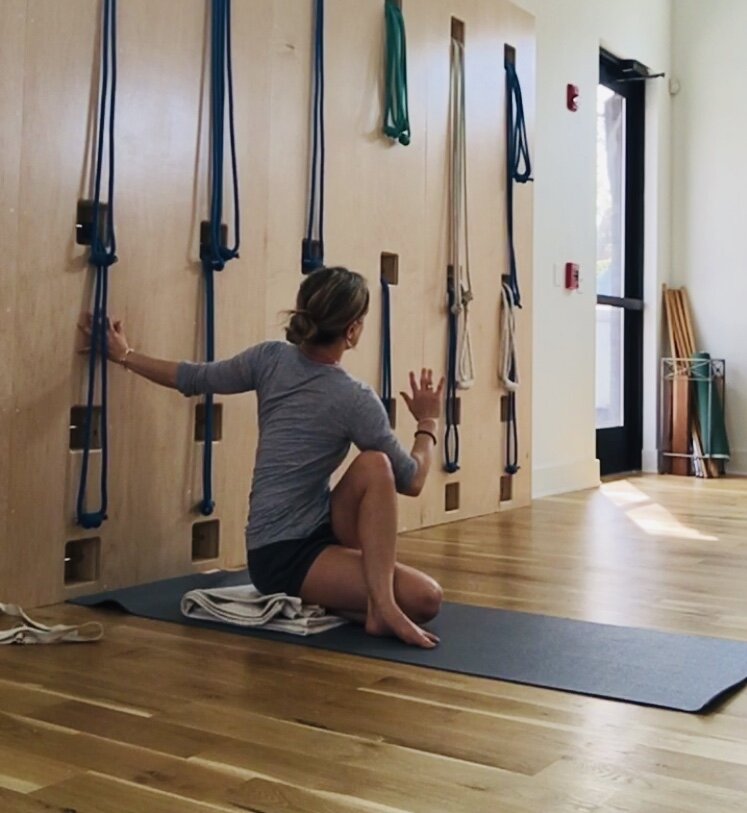
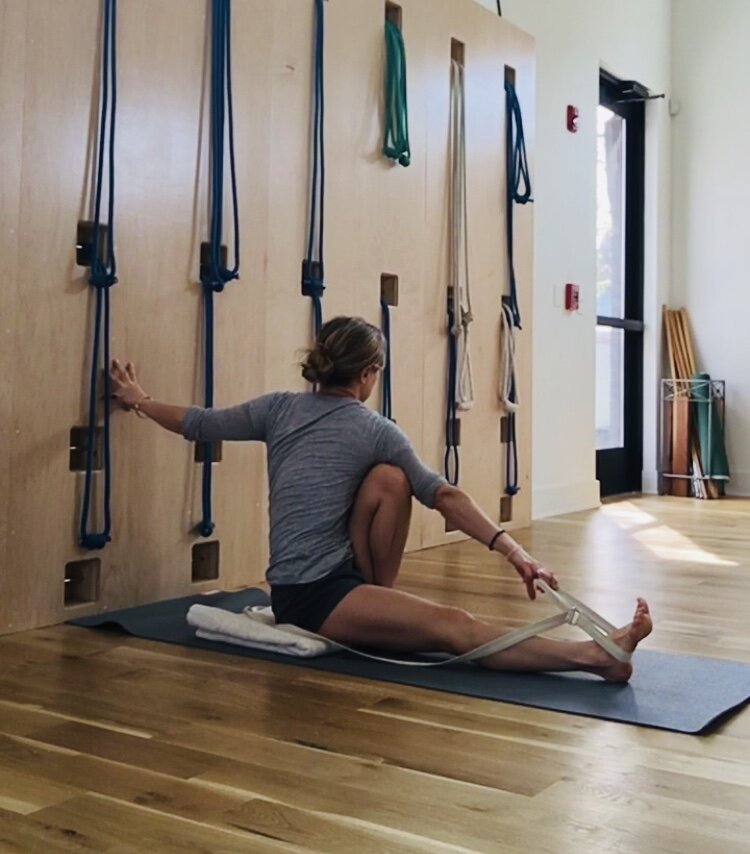
Below you will find a way to work with the belt if you find it difficult to catch the foot in the last stage. You will also find an image of the final clasp. In order to clasp, the twisting has to really come along. Repetition is key and you have to work the twisting from the lower abdomen all the way up. The grip to the outer leg and hips is essential to making the final clasp as you have to be very compact.
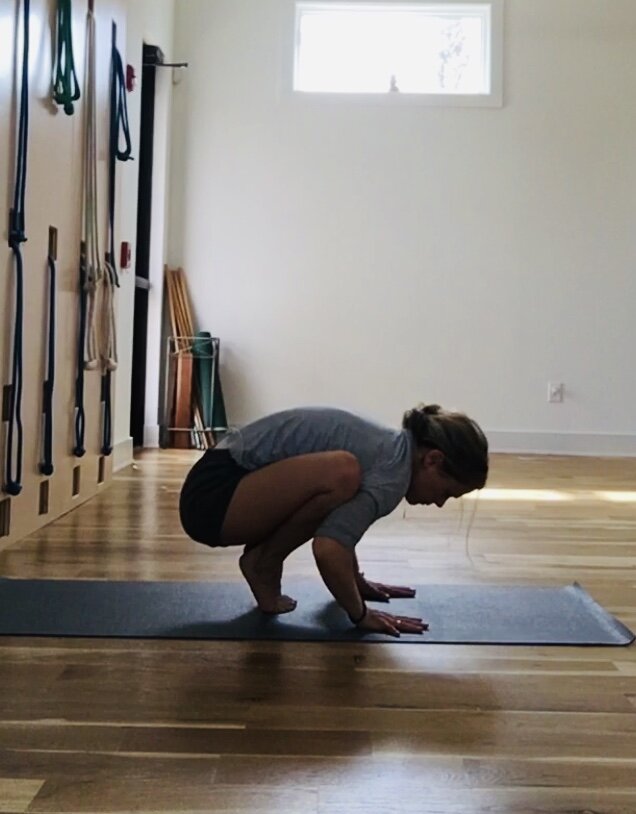
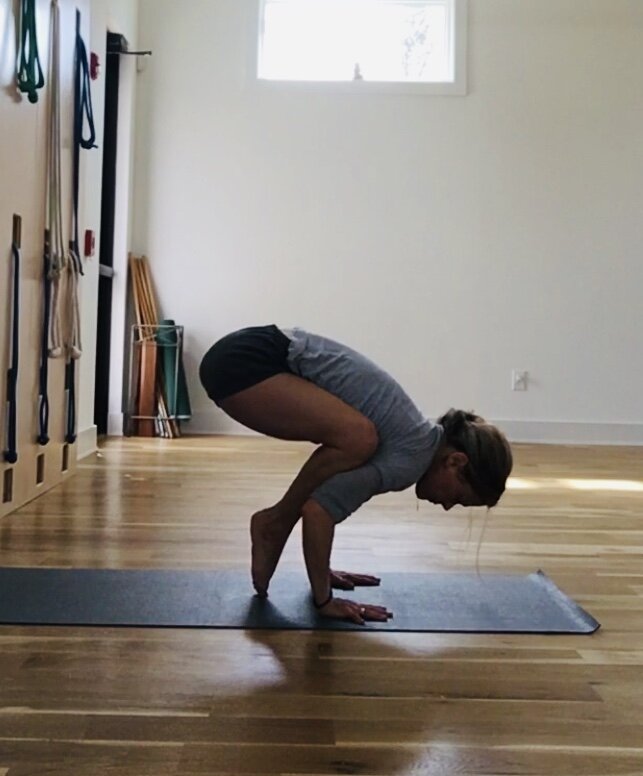
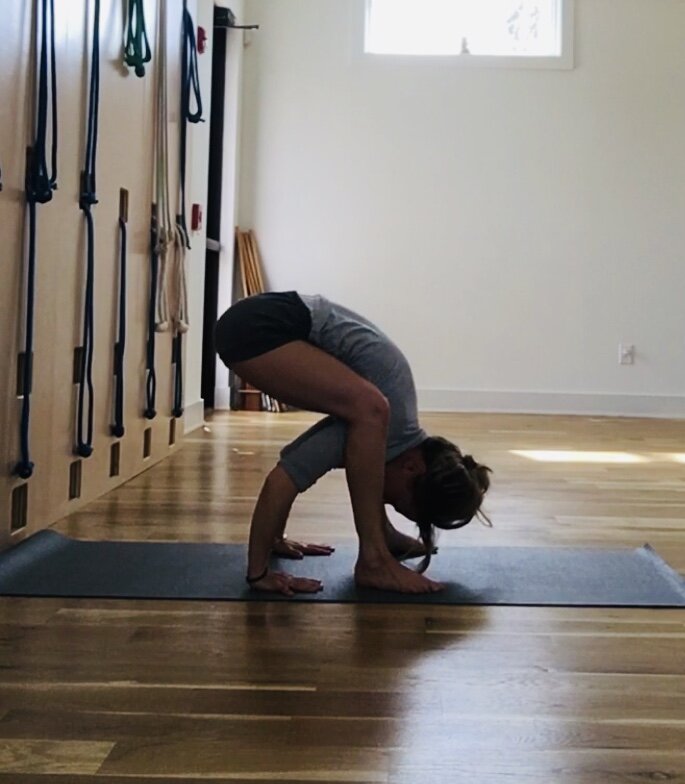
Parsva Bakasana (Crane posture to one side) I begin in Malasana and then turn the torso to the side and hook the outer leg as in Marichyasana III and Ardha Mastyendrasana. It is fine for the knees to scissor slightly, but I am staying as compact as I can and getting the upper arm to hook onto the outer knee as high as possible.


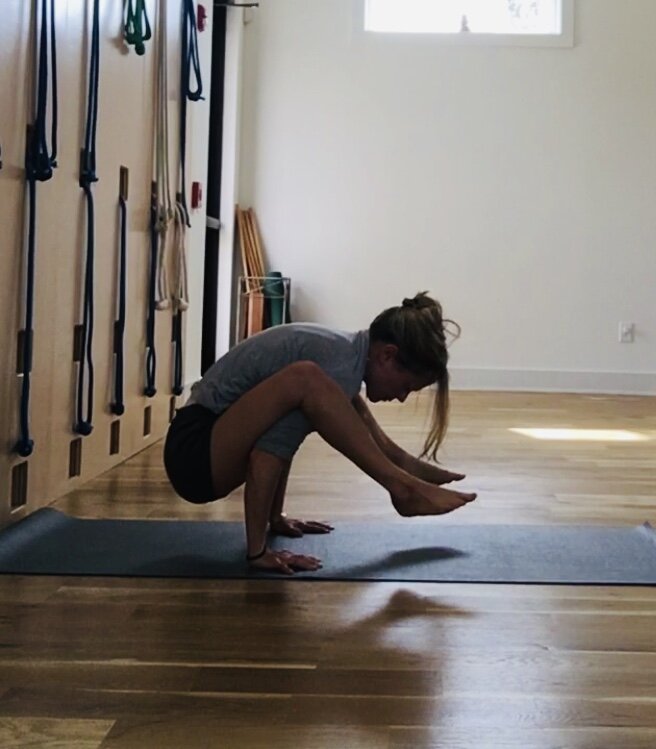
Once I have hooked, observe the transition. I lean forward bringing my forearms perpendicular to the floor and right over the wrists, transferring the weight from the leg side to the arm side. I balance the weight evenly over the palms.

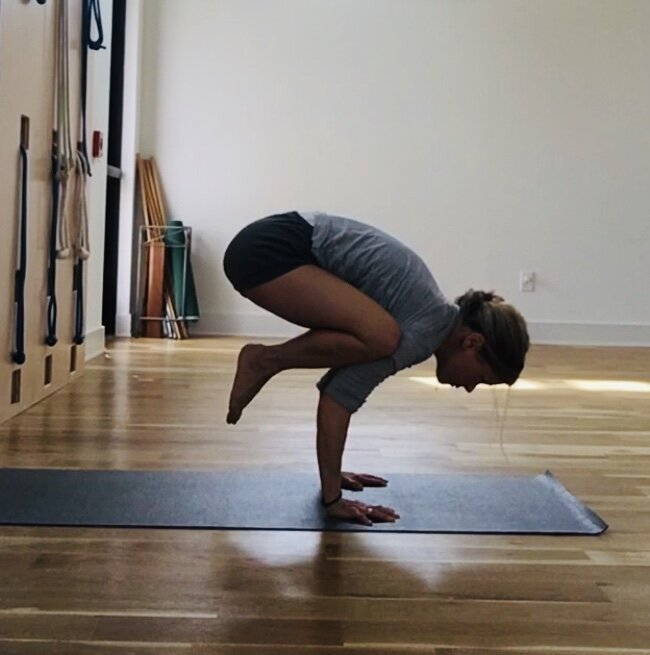
From here, I turn the abdomen away from the legs and raise the buttocks up as I turn. The feet will naturally begin to lift with this action. It is important to keep the palms evenly weighted and you can see that my torso is parallel to the floor.

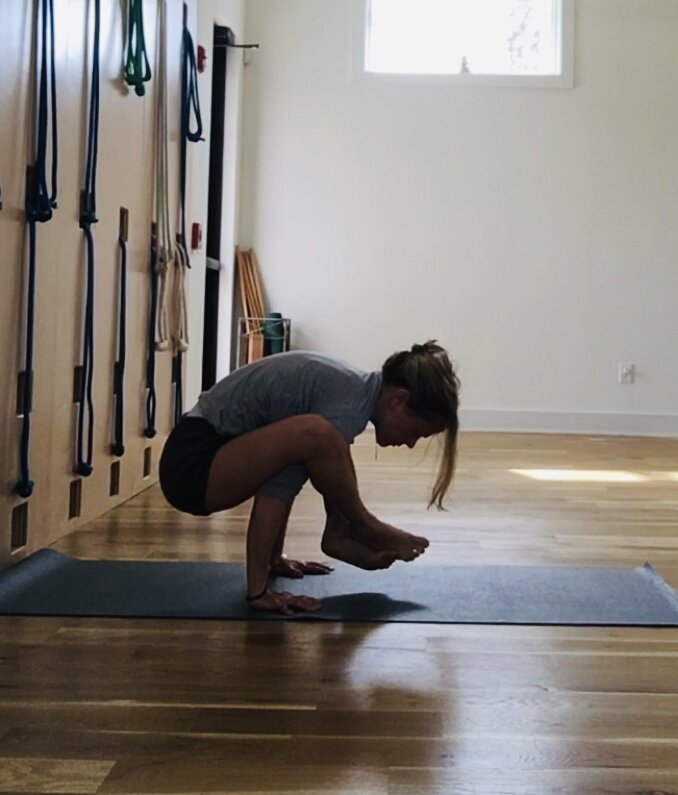
Bakasana (the crane) this will come nicely after the last pose, the legs have to clamp onto the upper arm like Marichyasana I! You got this.
Paschimottanasana as preparation for the next few poses.


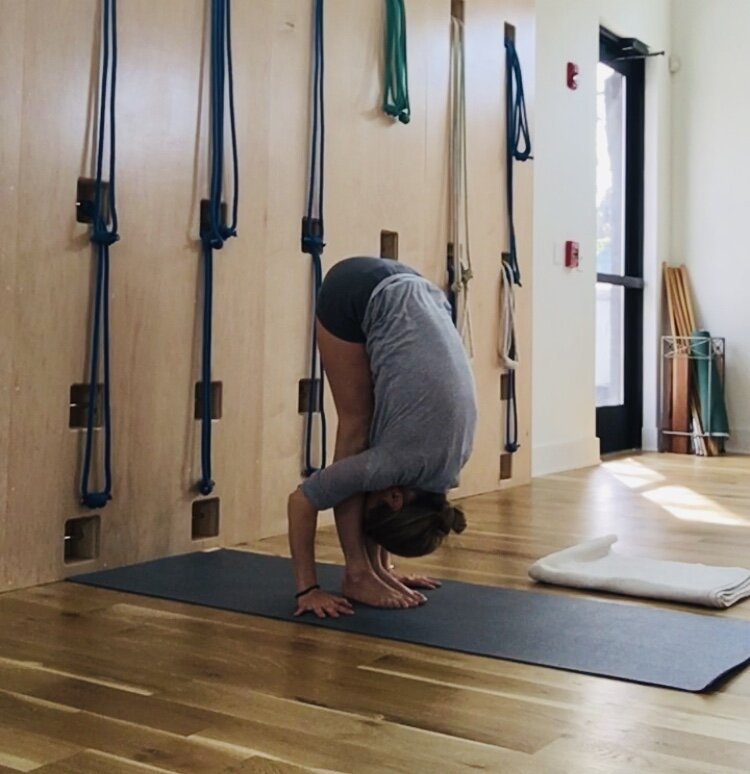
Kurmasana I (tortoise pose) from a wide Paschimottanasana as shown above, I bend my legs and tuck my upper arms underneath the knees and stretch the arms wide. Once the arms are stretched wide, I roll the thighs in and press them down.

Kurmasana II I begin as in the last pose. From here, I rotate the palms to face the ceiling and walk the arms straight back and intensify the stretch of the legs at the same time forward and away from the arms. Again, the thighs have to roll in and clamp the upper arms down.

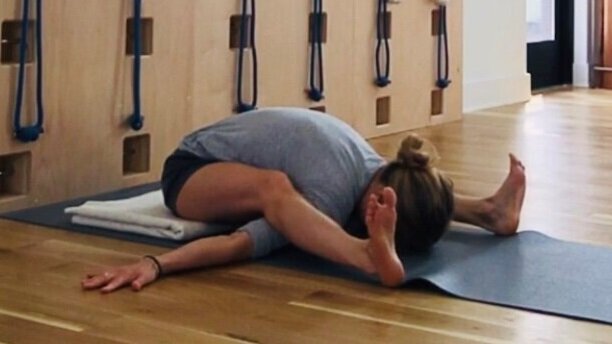
Supta Kurmasana (reclined Tortoise) From Kurmasana II, I bend my legs and draw them in a bit, from here, I reach the arms for eachother, if you cannot reach you can use a belt (not shown)


Once I have caught my hands, I walk my feet in towards each other and cross the feet (if possible, cross the ankles)

Dwi Hasta Bhujasana to Bhujapidasana the last pose will have prepared you well for this pose! I won’t say much here either than to have fun! If the flexion of the wrist pains you, you can use a rolled mat or slant board under the heel of the hand. More instructions on these poses can be found in the home practice sequence ‘Between Earth and Sky.’

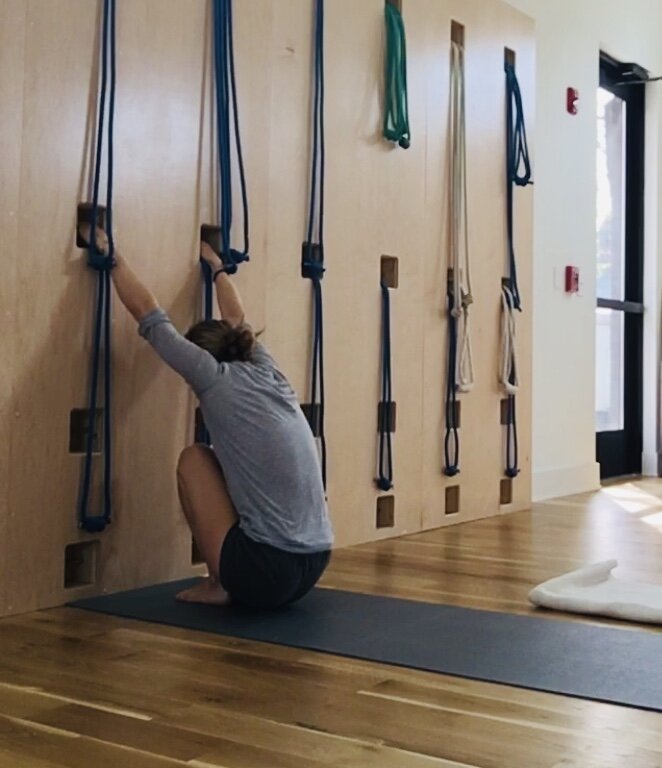
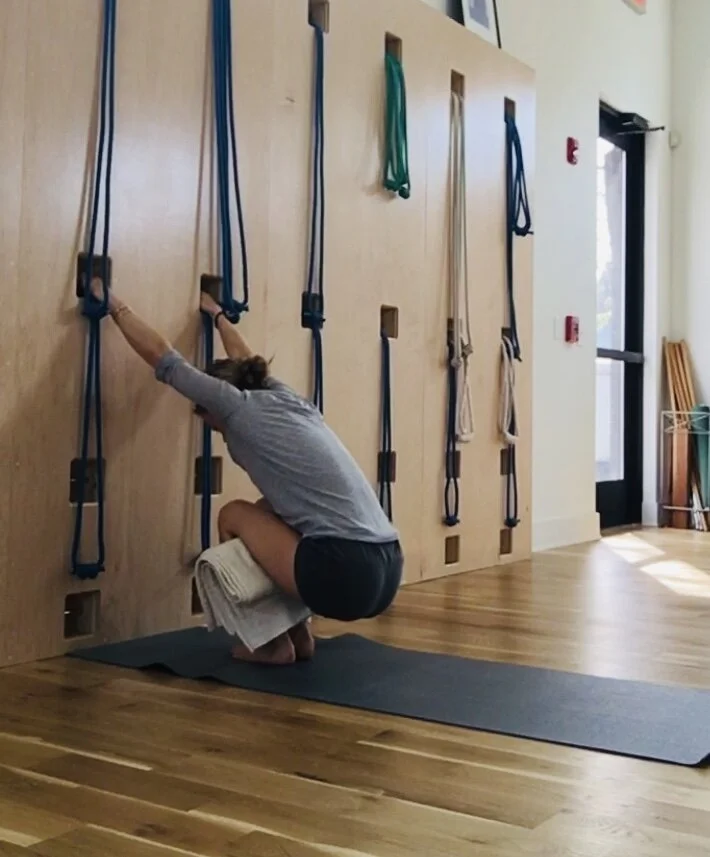
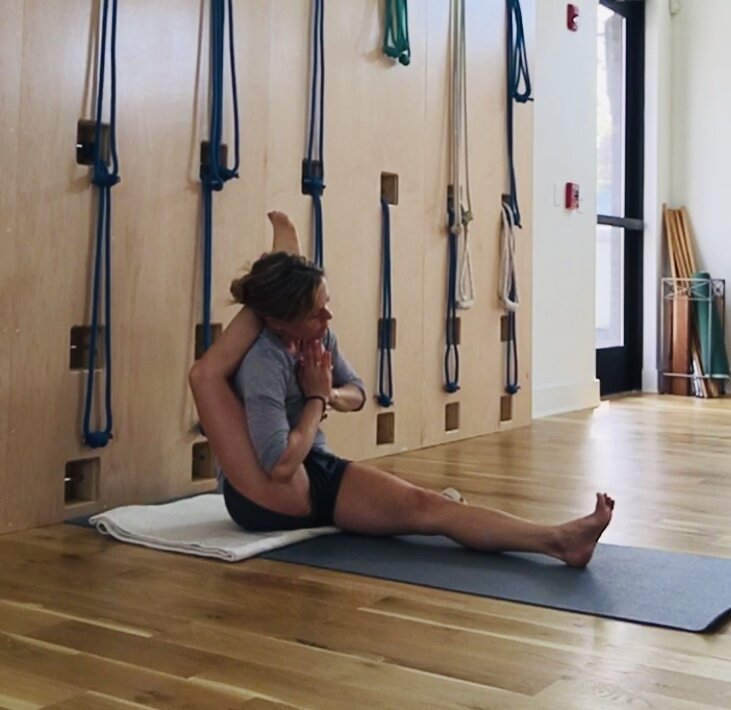
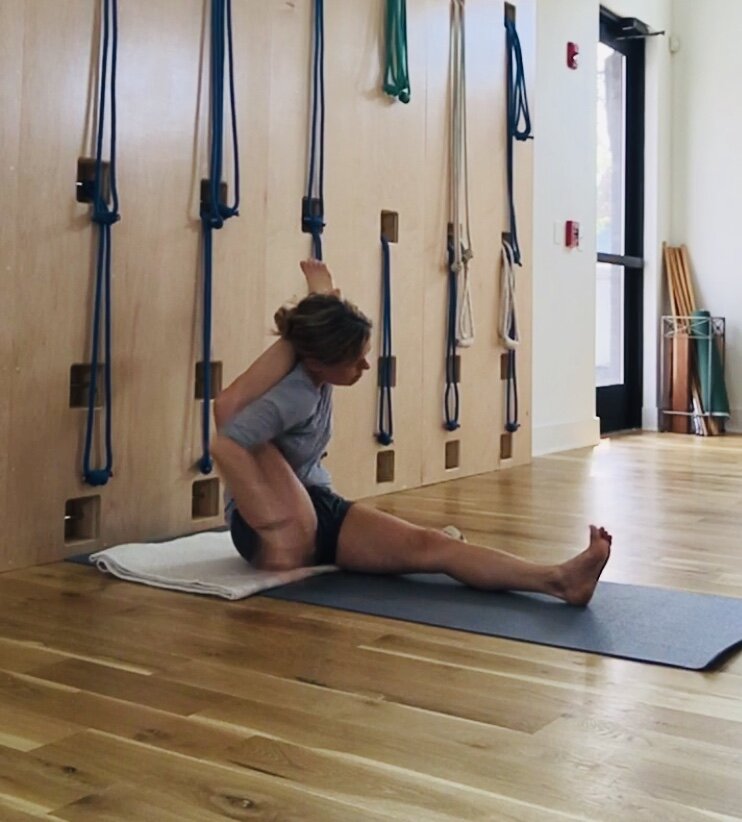
Eka Pada Sirsasana (one foot behind the head pose) I am showing this pose in stages. Each photo represents a stage. Each stage I will do and repeat. This pose can be challenging for anyone with stiffness in the hip. You may be able to take just one stage. Try what you can. Allow for some freedom and movement in the first stage, just getting the leg to go back, then try tucking the arm in front of the leg as in the following photo. If that is coming along, use both legs and see if you can adjust the foot and leg further back.
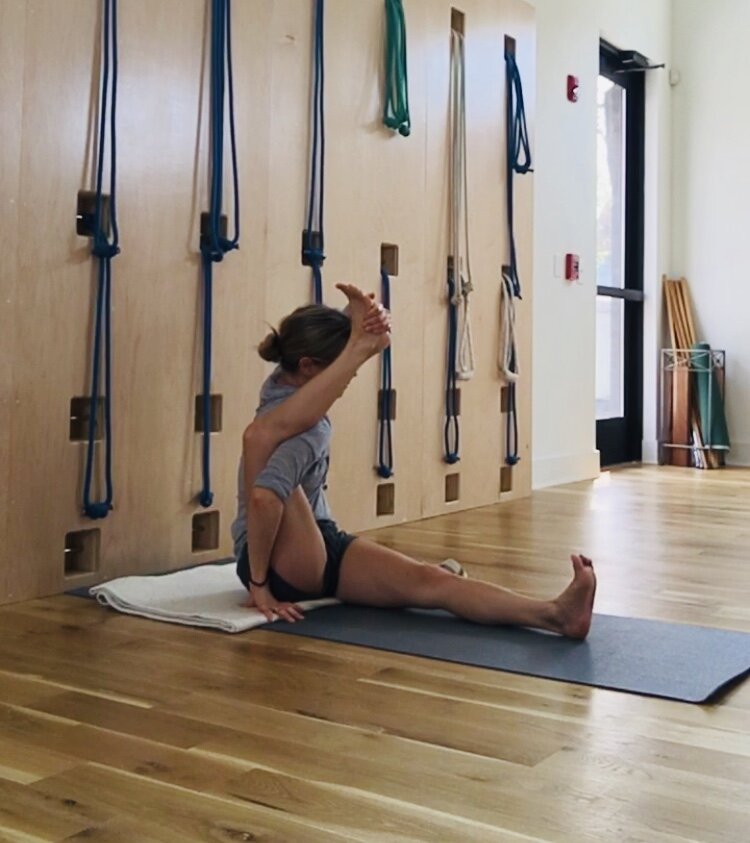
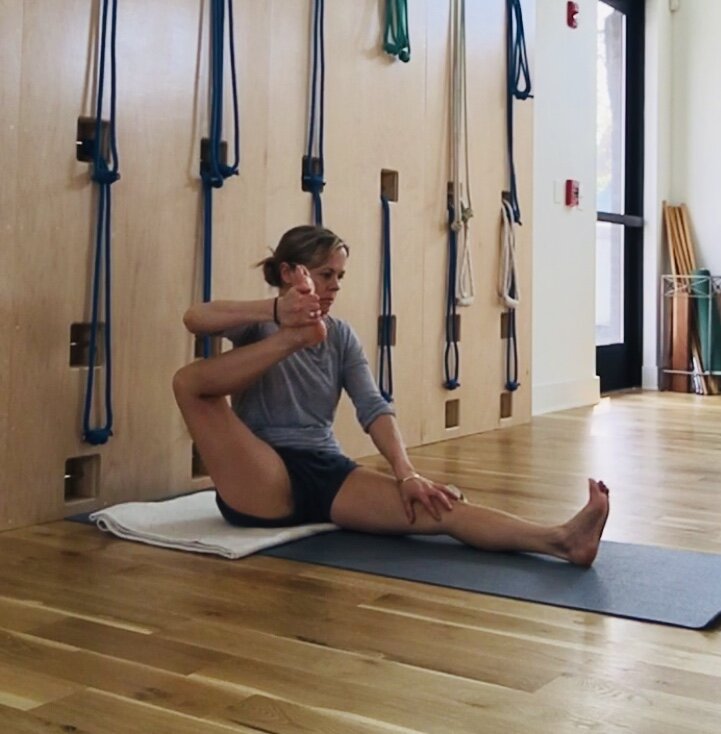

If you can get the leg to move back with some ease, try dunking the head in front. If the leg feels very heavy, continue to use your hands to support the weight of the leg. If it starts to feel light, you can try hooking it behind the neck and folding the palms in Namaskar as in the final pose.
Bharadvajasana I (pose to sage Bharadvaja) this is a wonderful release to the spine as it is brought back in. You can keep the form a bit loose and simply go for a generous lift and upward stretch to the anterior spine.
Bharadvajasana II this variation brings the spine further in.
Padmasana (Lotus) Full lotus will come nicely for many of you. I have may hands interlaced and stretch upward in Parvatasana. I am letting my spine move generously in to release it from the earlier poses. Don’t forget to change the cross of the legs and take the opposite interlace of the hands. This pose will feel refreshing.

There are many places to go from here, you can add in a twist or even go for Baddha Padmasana if you like. Matsyasana would also come nicely next. As would Chatush Padasana and the Sarvangasana cycle. In your home practice it is wonderful to explore sequences from Masters. I follow my teacher Patricia’s sequences some times. I also follow the Sequences suggested by Guruji in Light on Yoga and Geeta in the Preliminary Course. But also it is important to follow your own good instincts. To explore. To go inward and through deep listening find out what it is your body needs next. Or to be adventurous and explore a pose that is challenging that you feel might come well with the work you’ve been doing. While good sequencing has an underlying intelligence, the options for where you can explore are endless. That is the gift of a home practice.
Aum Peace Peace Peace
Our home practice resource is free and open to the public. If you are enjoy this post and our other home practice resources and feel inspired to donate, you can donate with PayPal here.
